Wholesalers
Quick Start Guide: Boldr - Installer App & Controller Setup
Welcome to the Boldr Pro ecosystem. This guide will walk you through setting up your account, joining your organization, and installing your first Boldr Controller.
Part 1: Getting Started
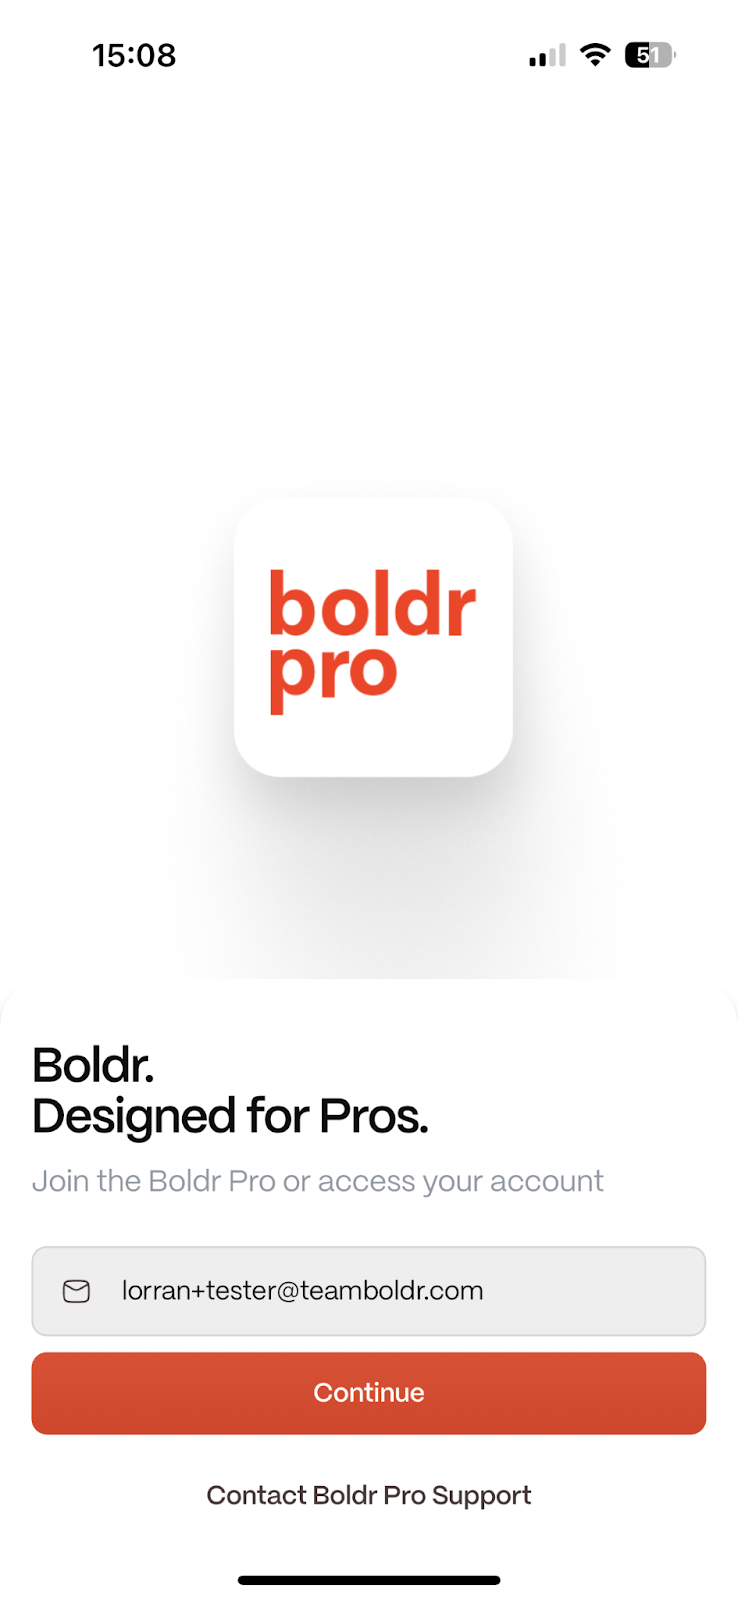
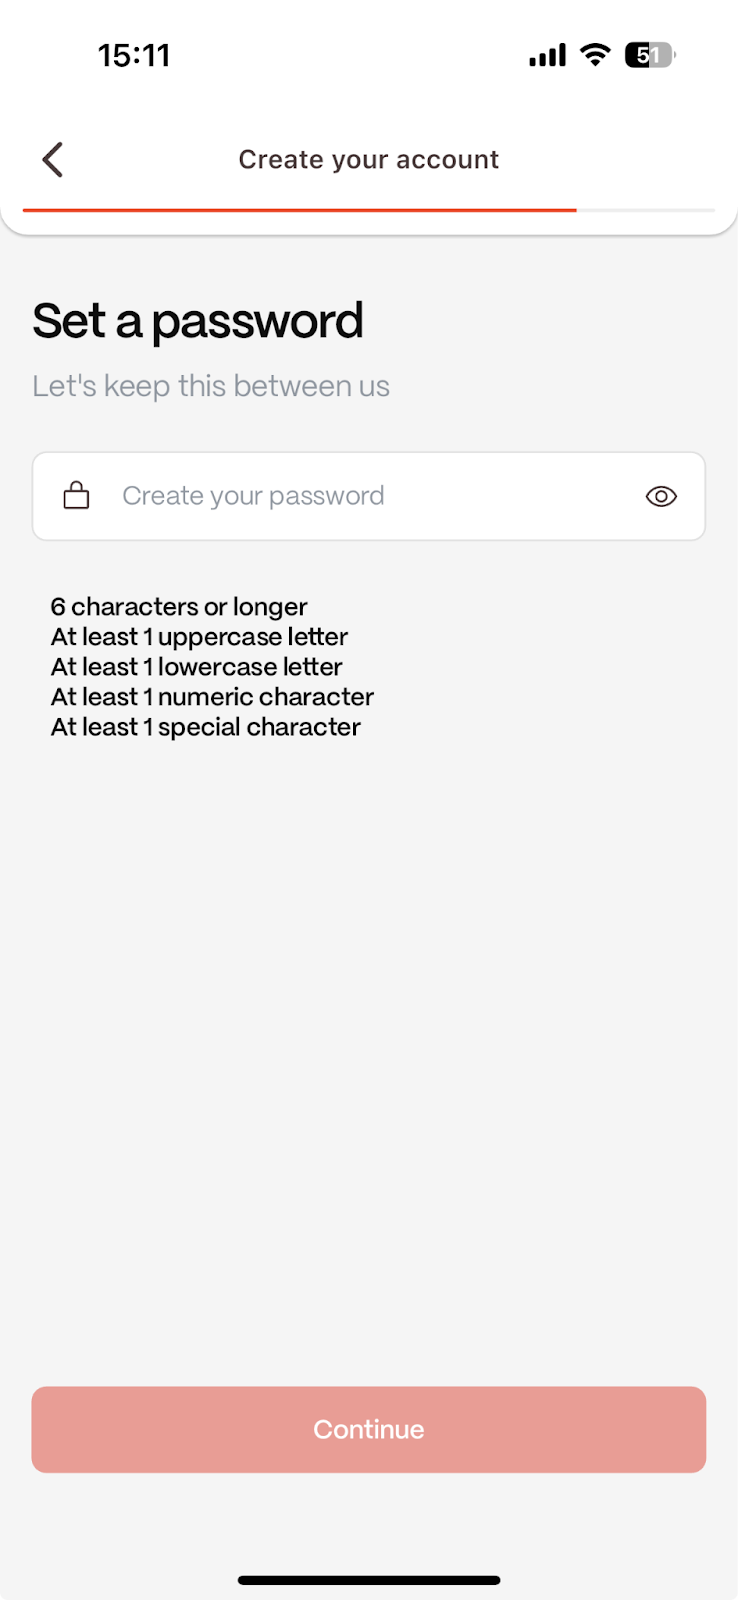
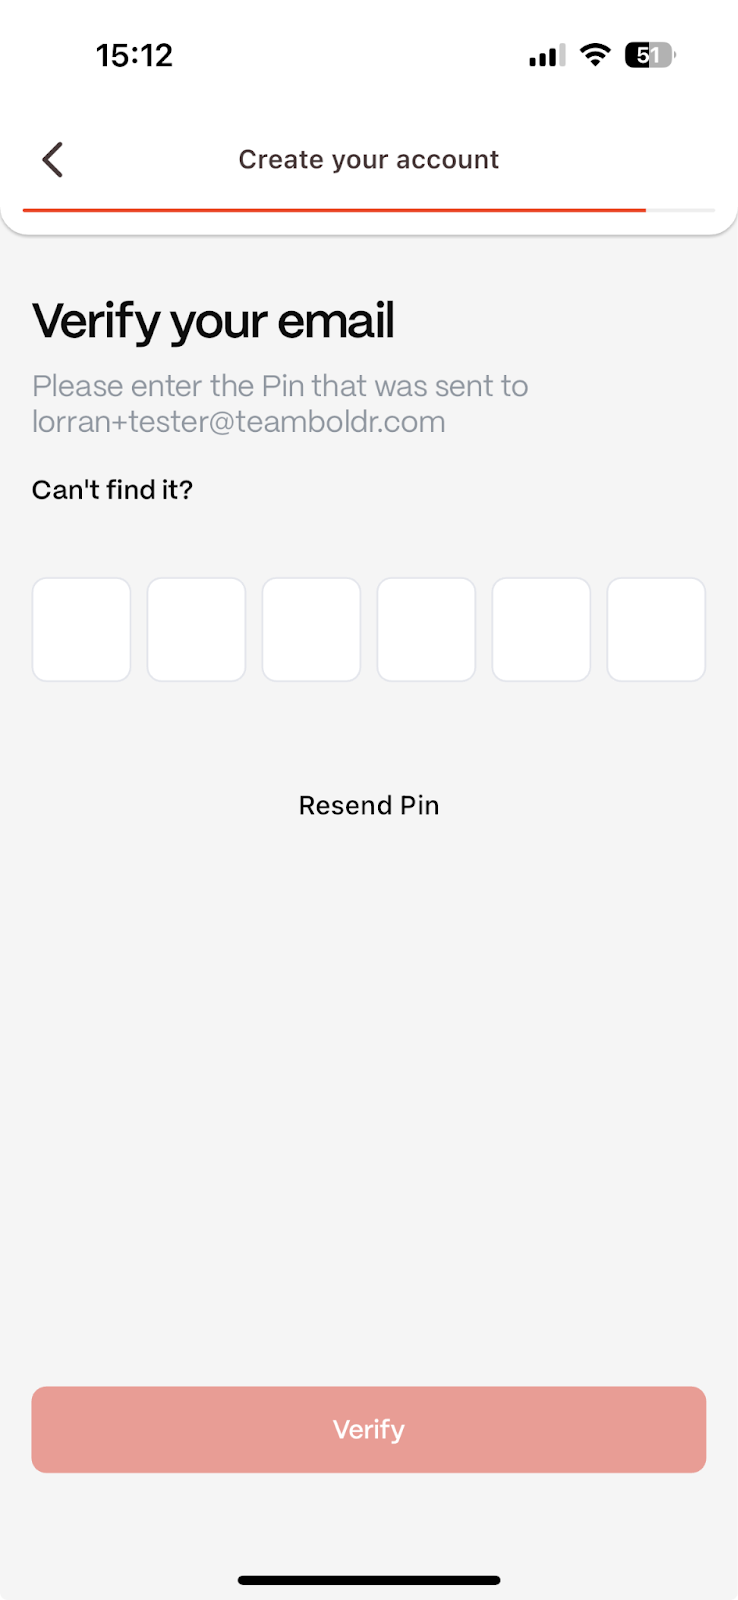
1. Download the Boldr Pro App & Create Your Account
First, download the Boldr Pro app from your app store.
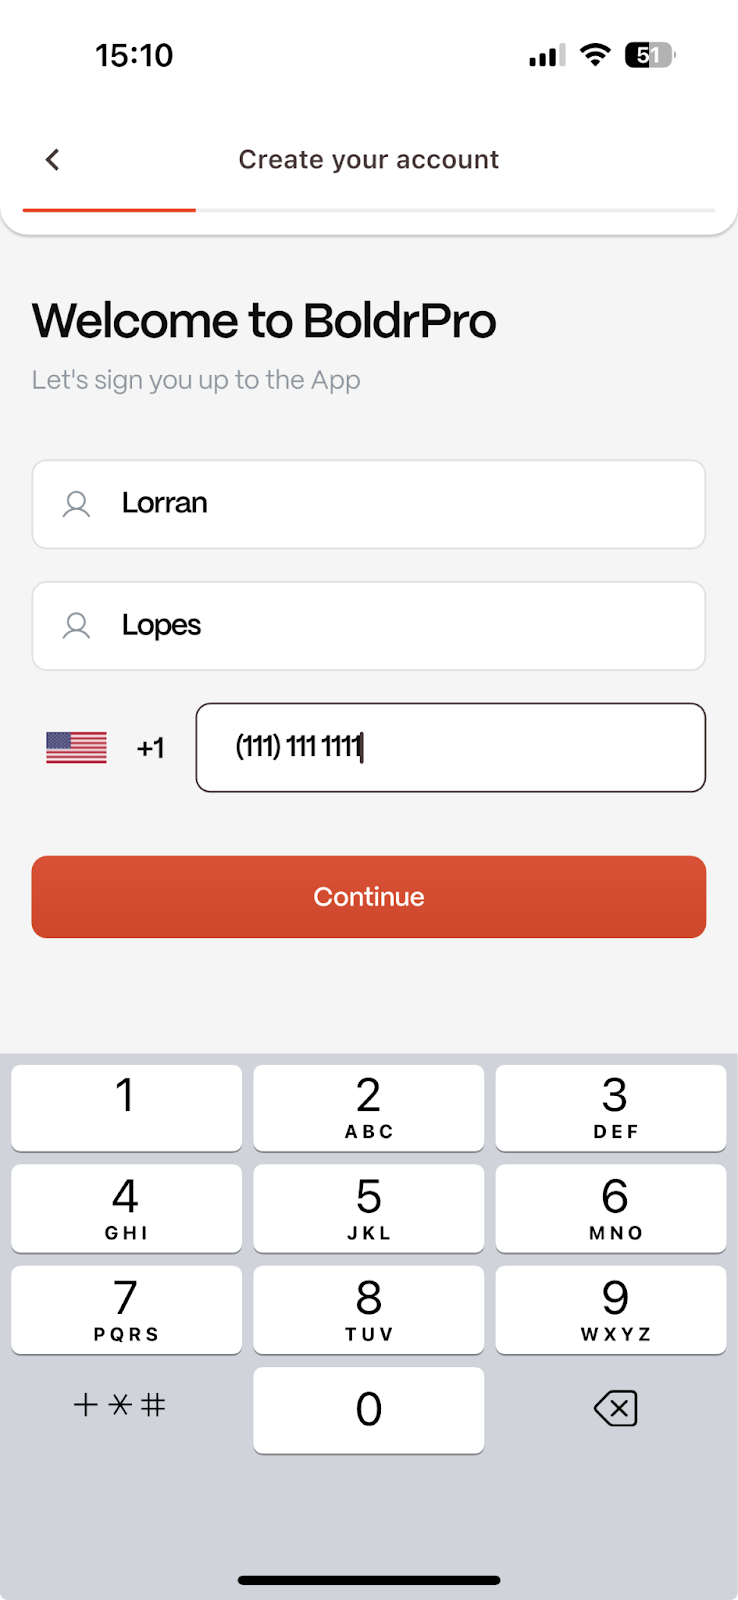
Once installed, open the app and create a new account using your work email address.
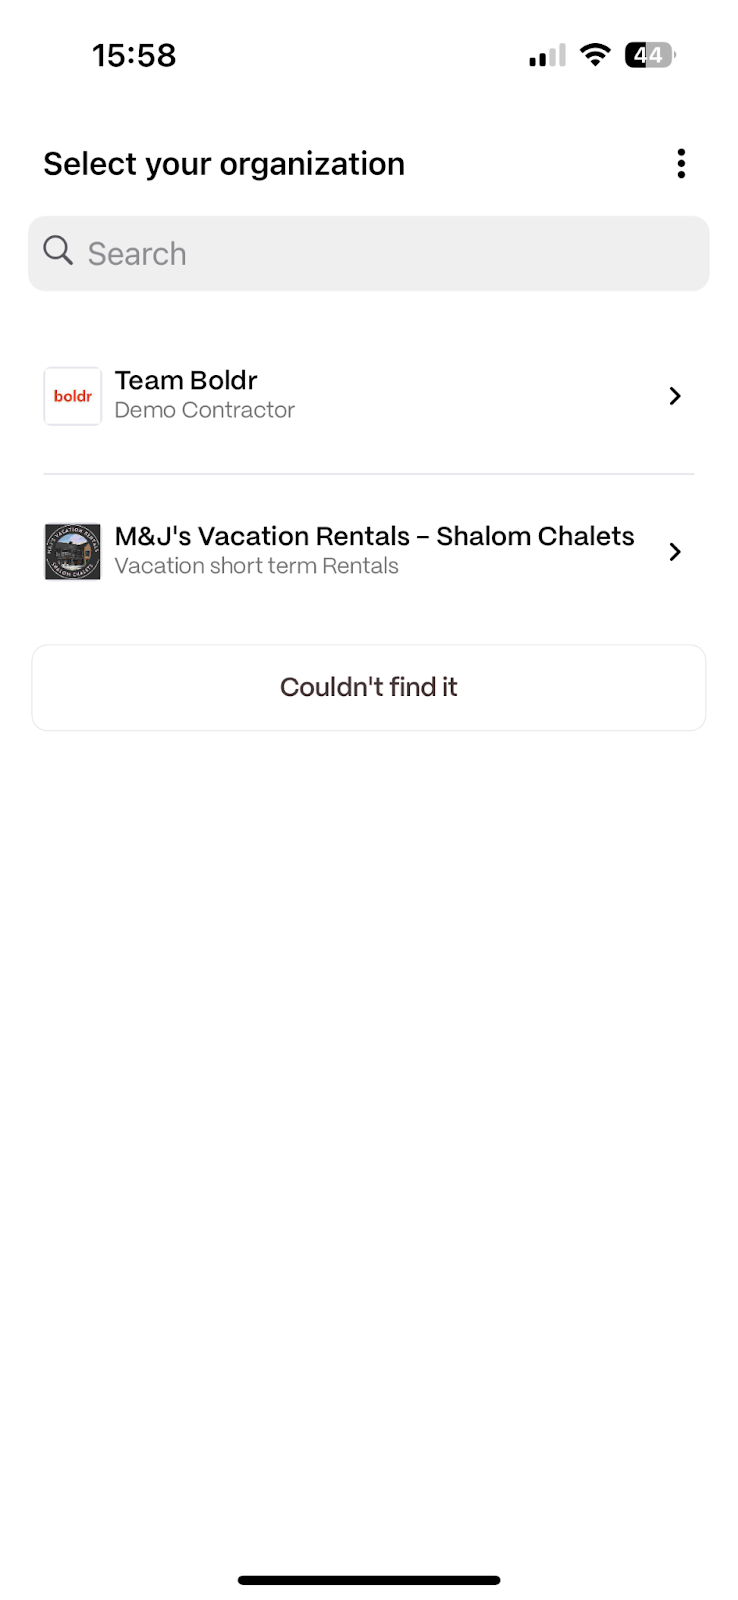
2. Join Your Organization
After creating your account, the app will automatically attempt to link you to your organization based on your email address. The following scenario may apply to you:
Your organization is not listed.
What you'll see: A search list with no results for your company.
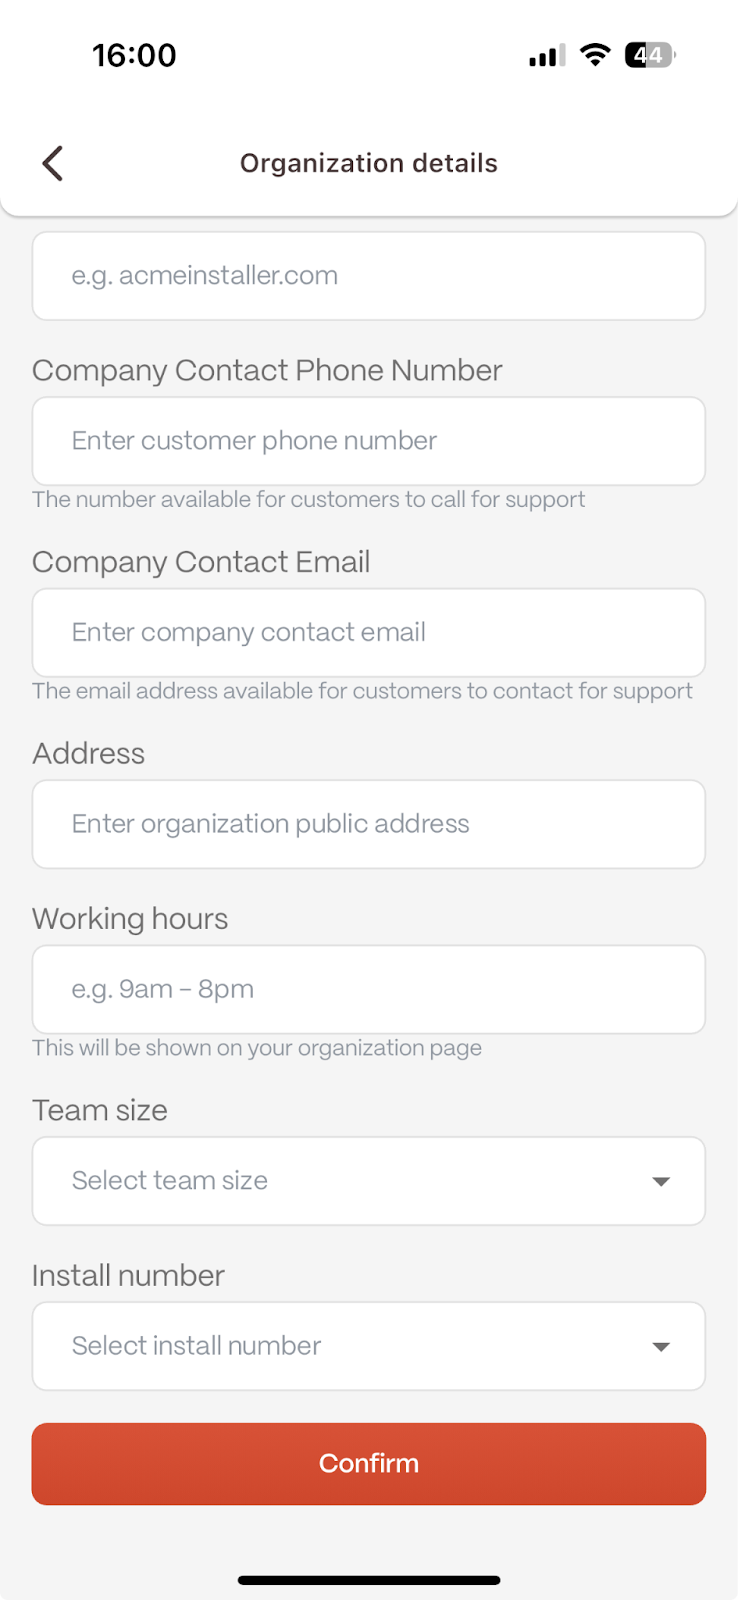
What to do: Tap the "Couldn't find" button and fill out the form to create your organization.

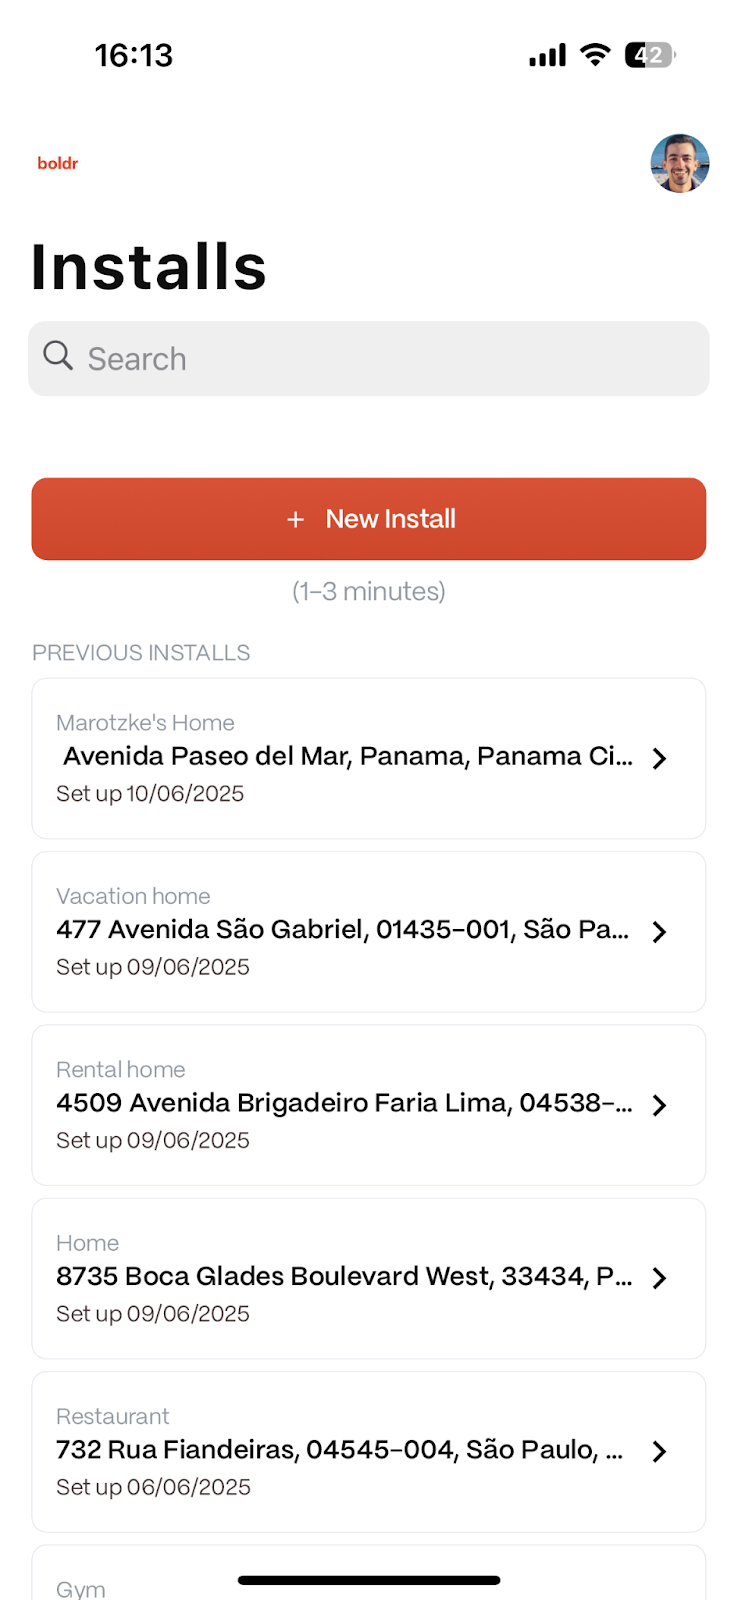
Once you are linked to an organization, you will see its dashboard, where you can view previous installations or start a new one.
Part 2: Creating a New Installation
1. Start a New Install
On the main screen, tap New Install. If this is your first time, tap Create First Install.
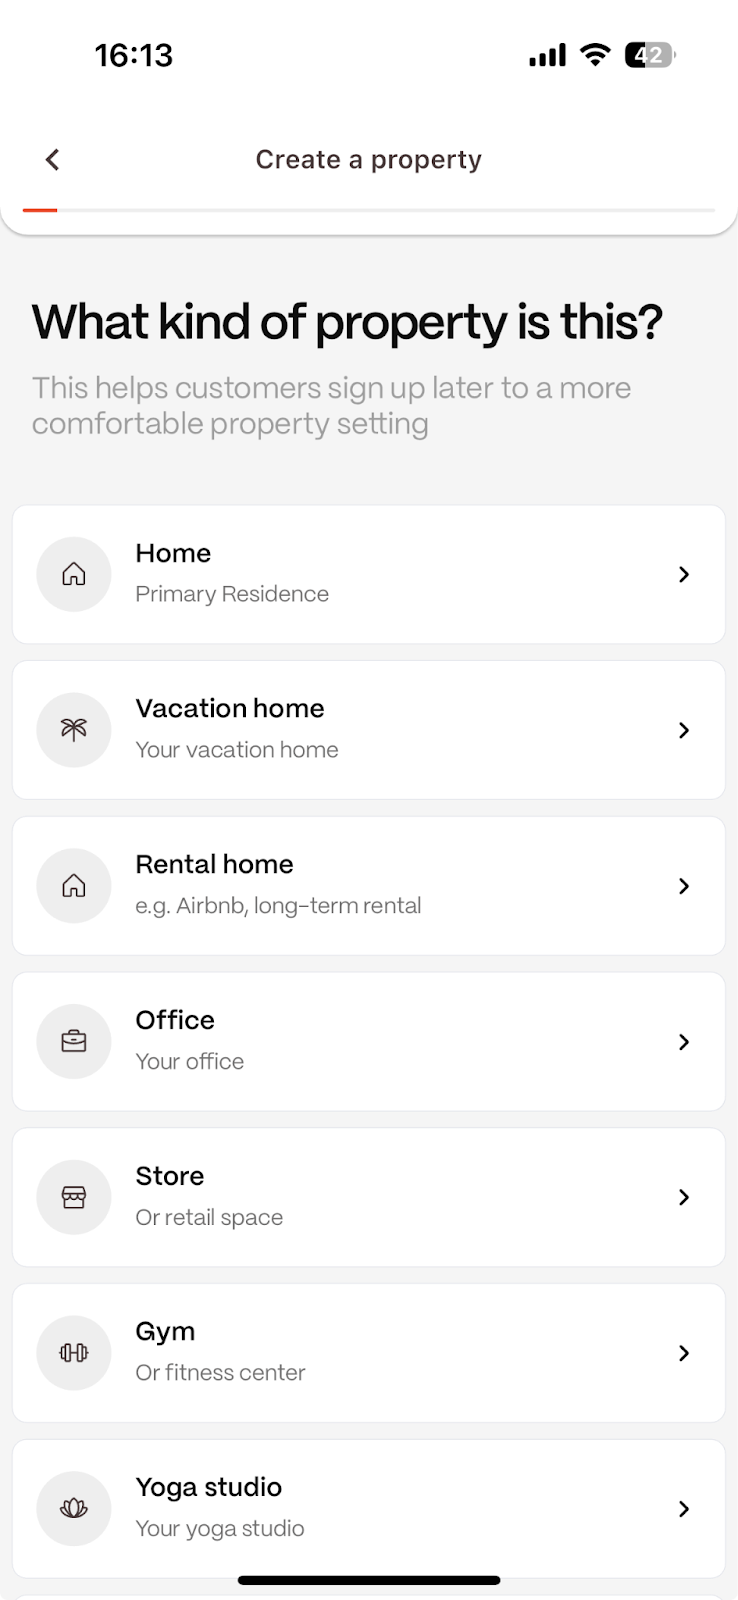
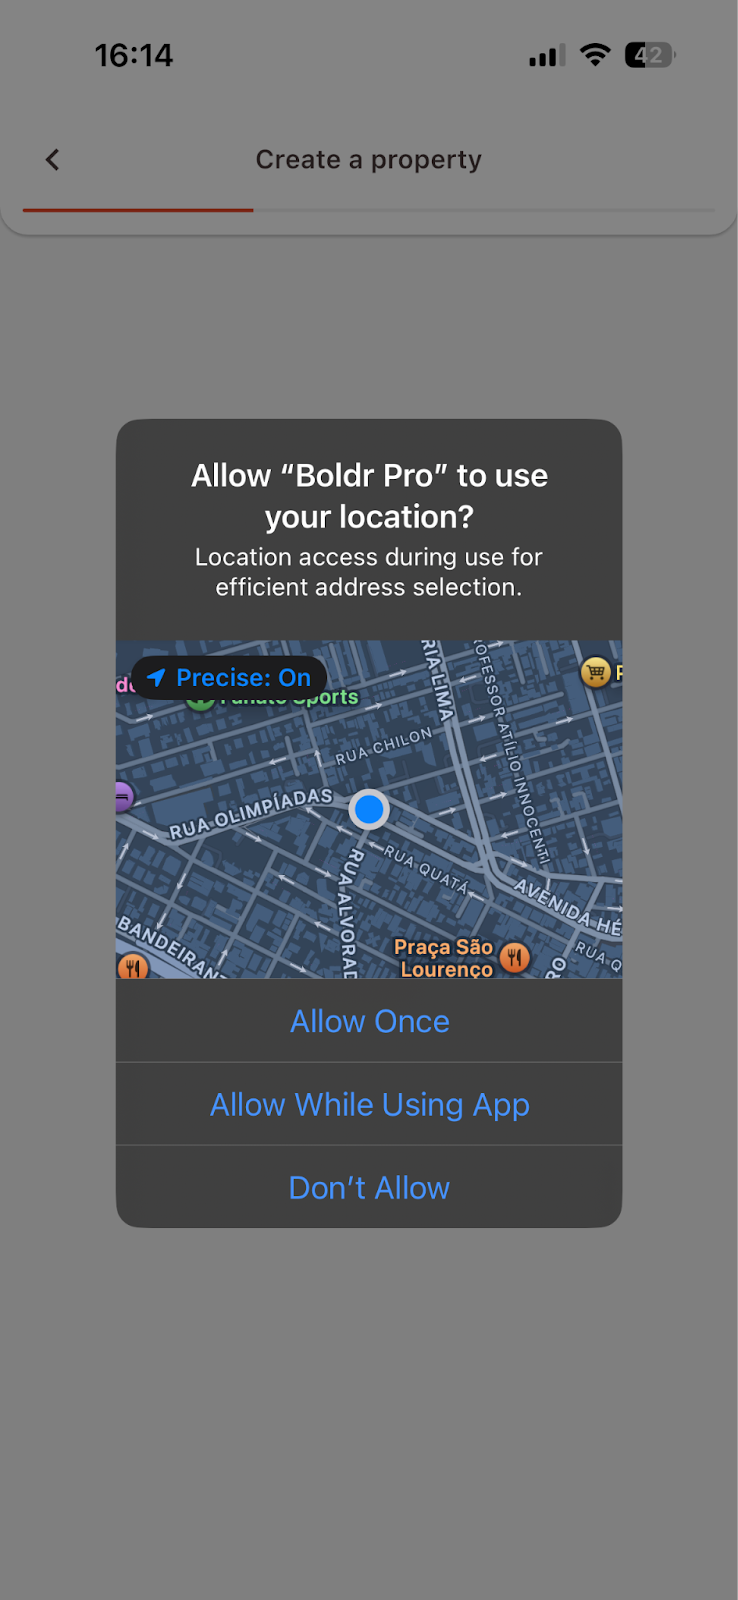
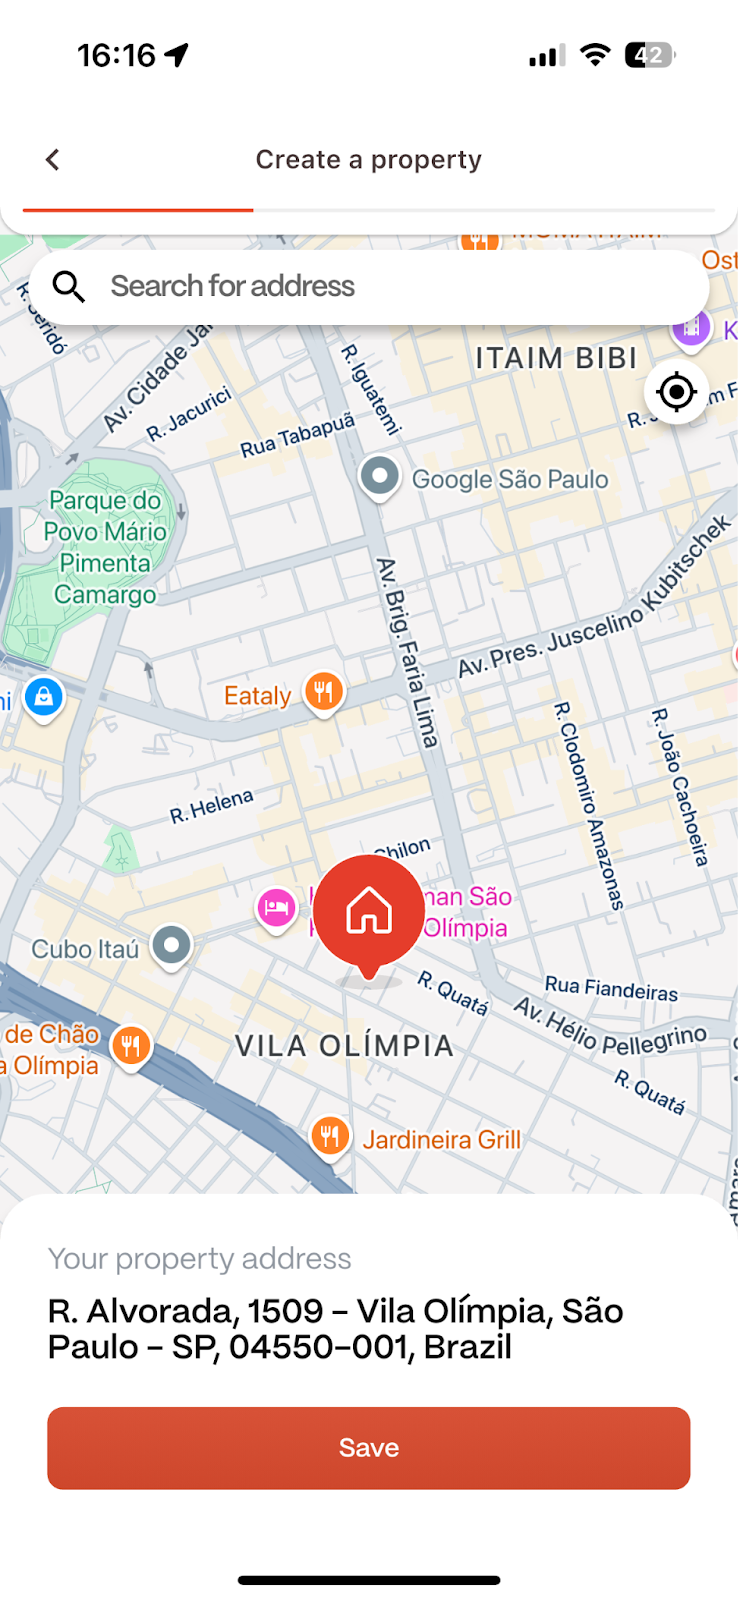
2. Set the Property Location
Select the Property Type (e.g., Home, Office).
The app will ask for location access. Choose Allow While Using the App.
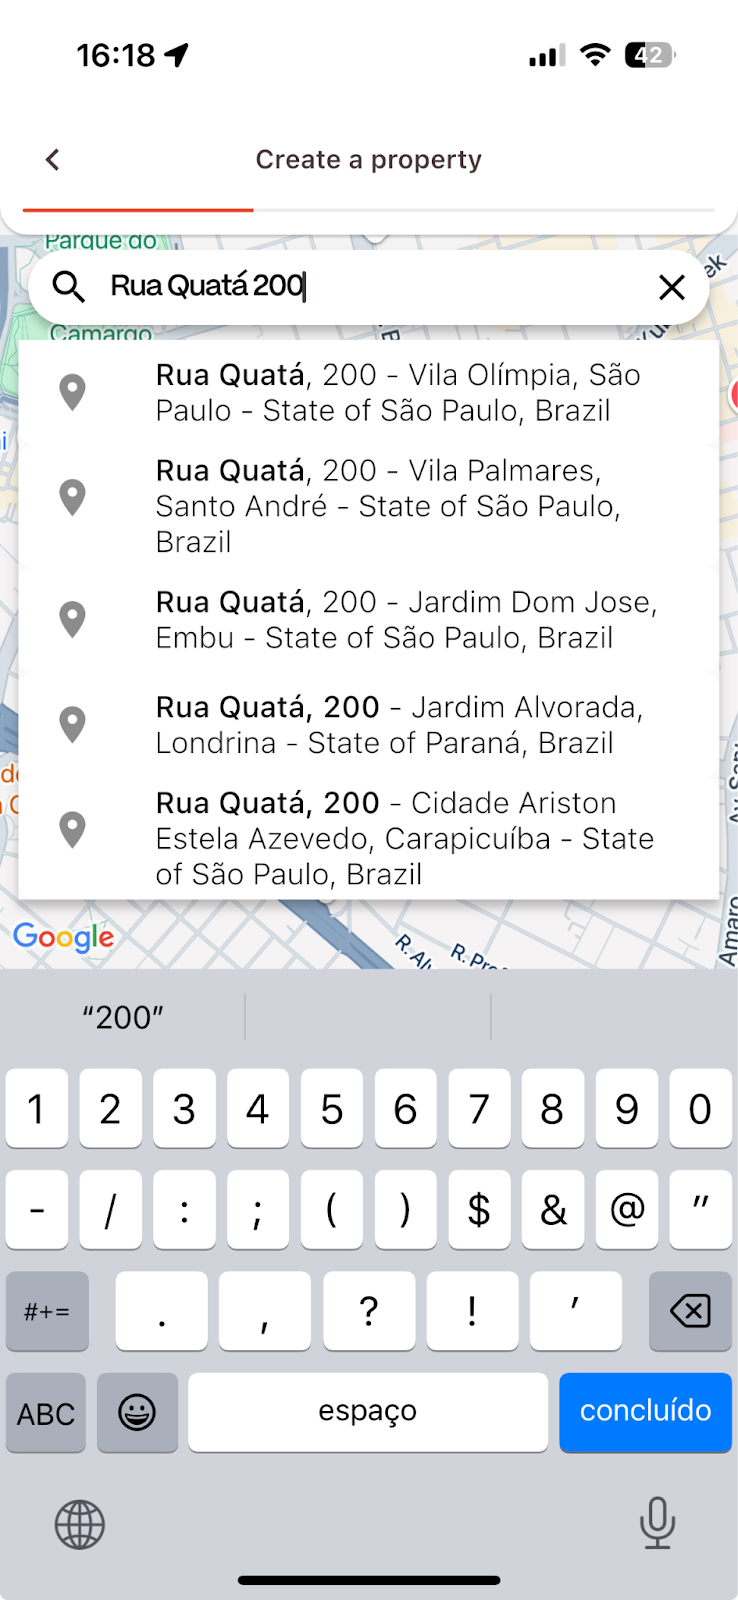
Use the map to find the property or enter the address manually.
When the pin is in the correct location, tap Save.
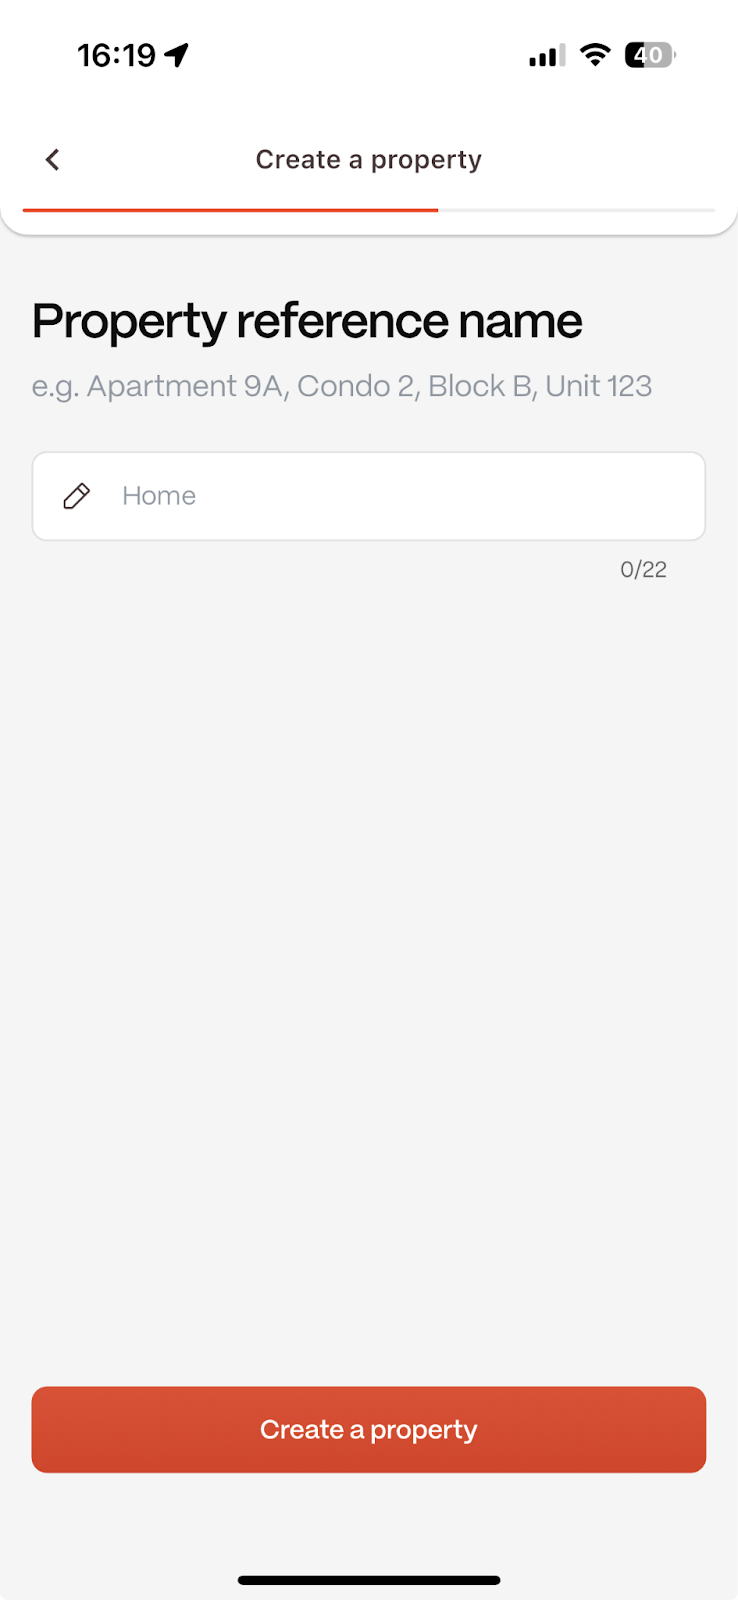
3. Name the Property
You can assign a custom nickname to the property (e.g., "123 Main St - Unit 2B") to easily identify it later. Tap Save.
Part 3: Pairing a Boldr Controller
Follow these steps to connect a Boldr Controller to the property you just created.
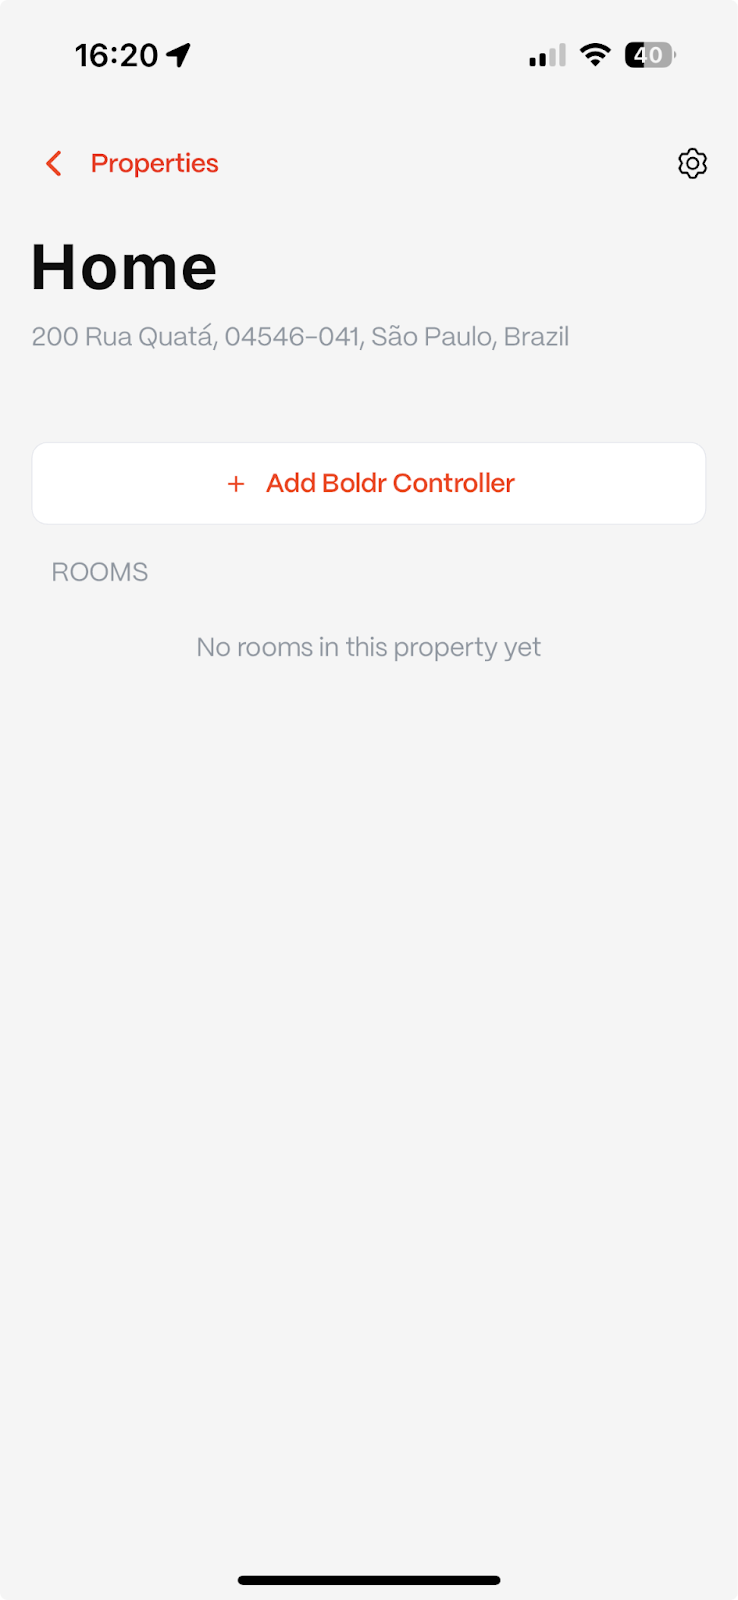
1. Add the Controller and Grant Permissions
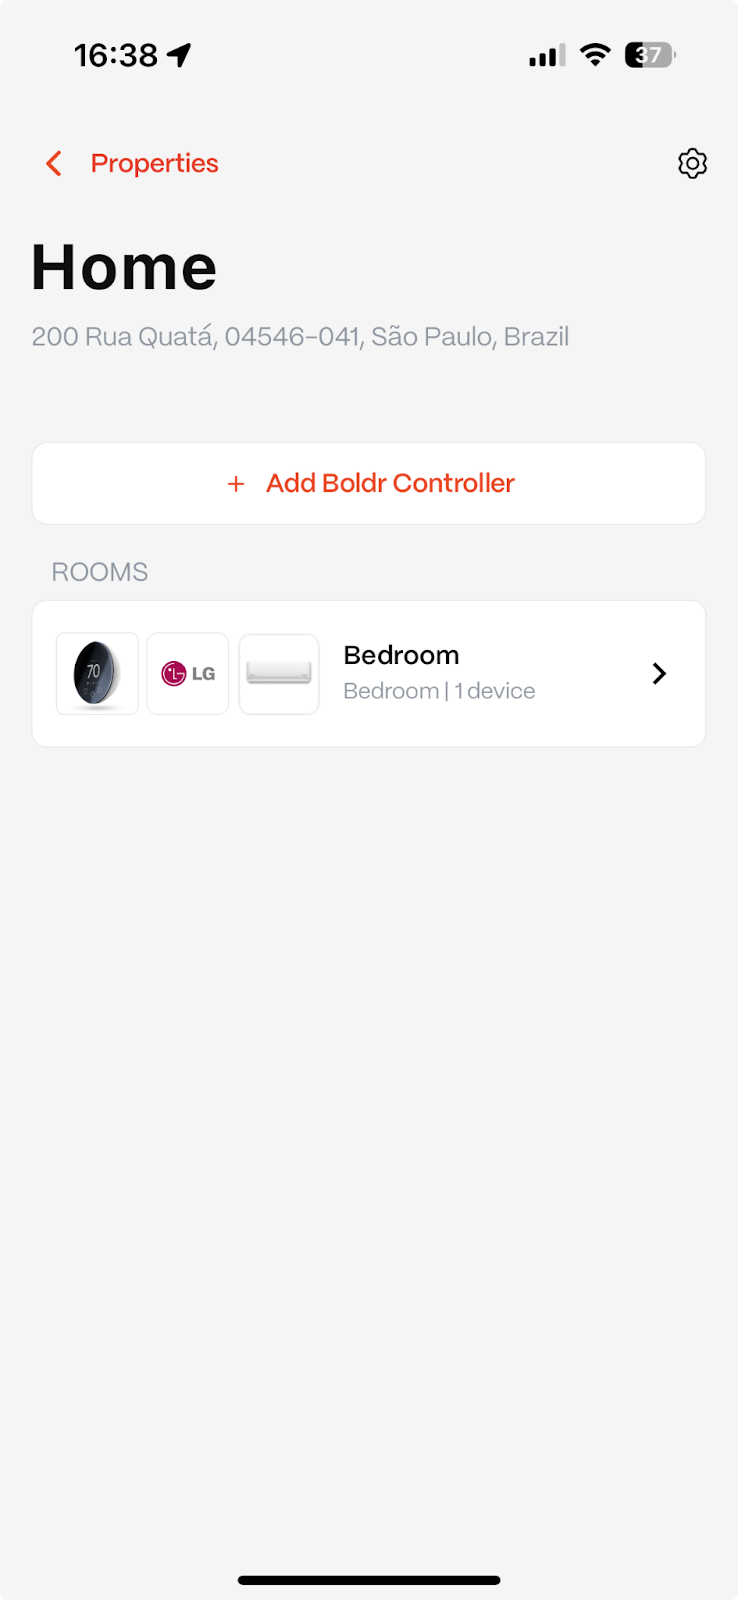
On the property screen, tap Add Boldr Controller.
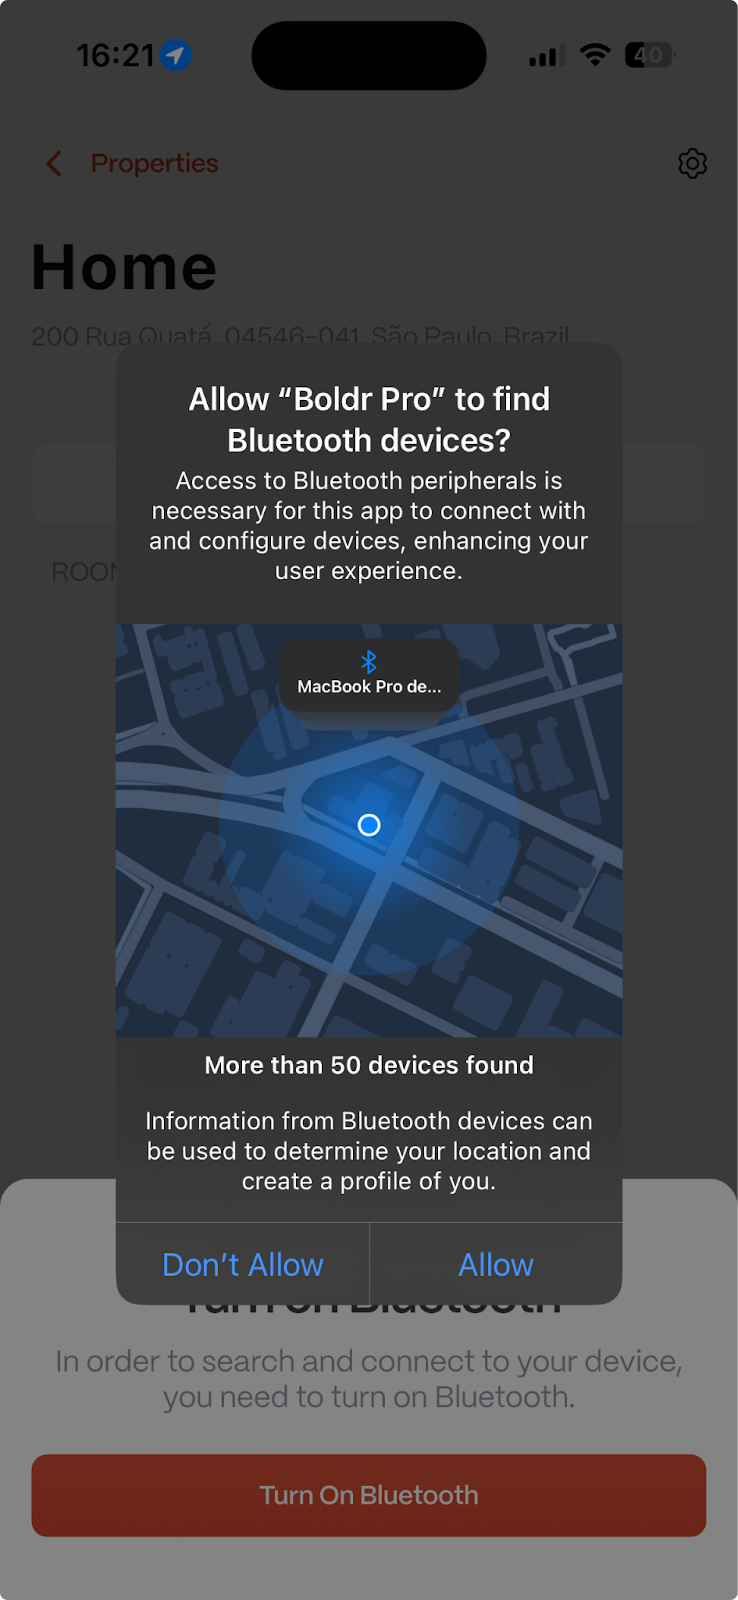
A prompt will ask for Bluetooth access. Tap Allow. (You will only be asked this once.)
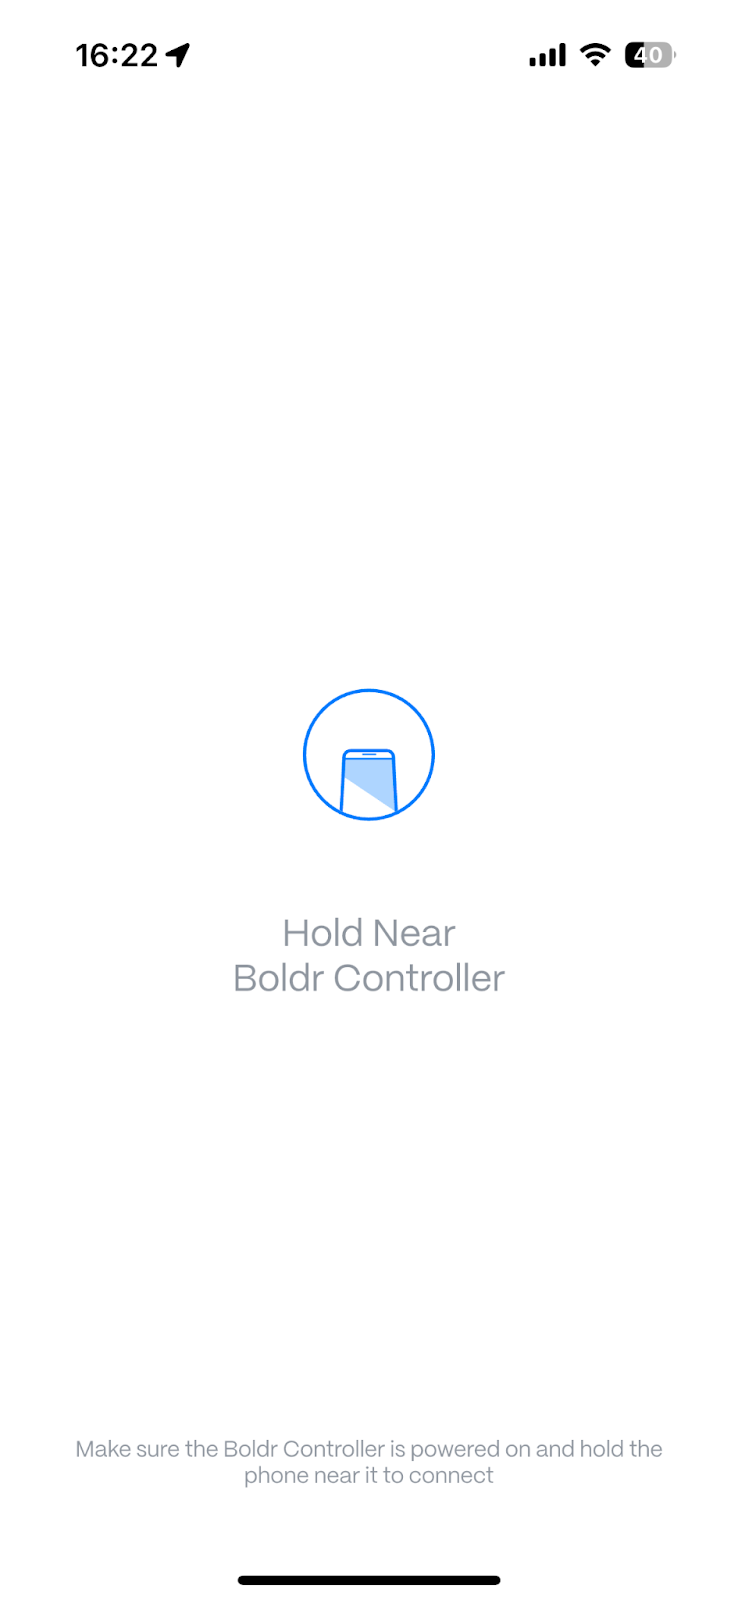
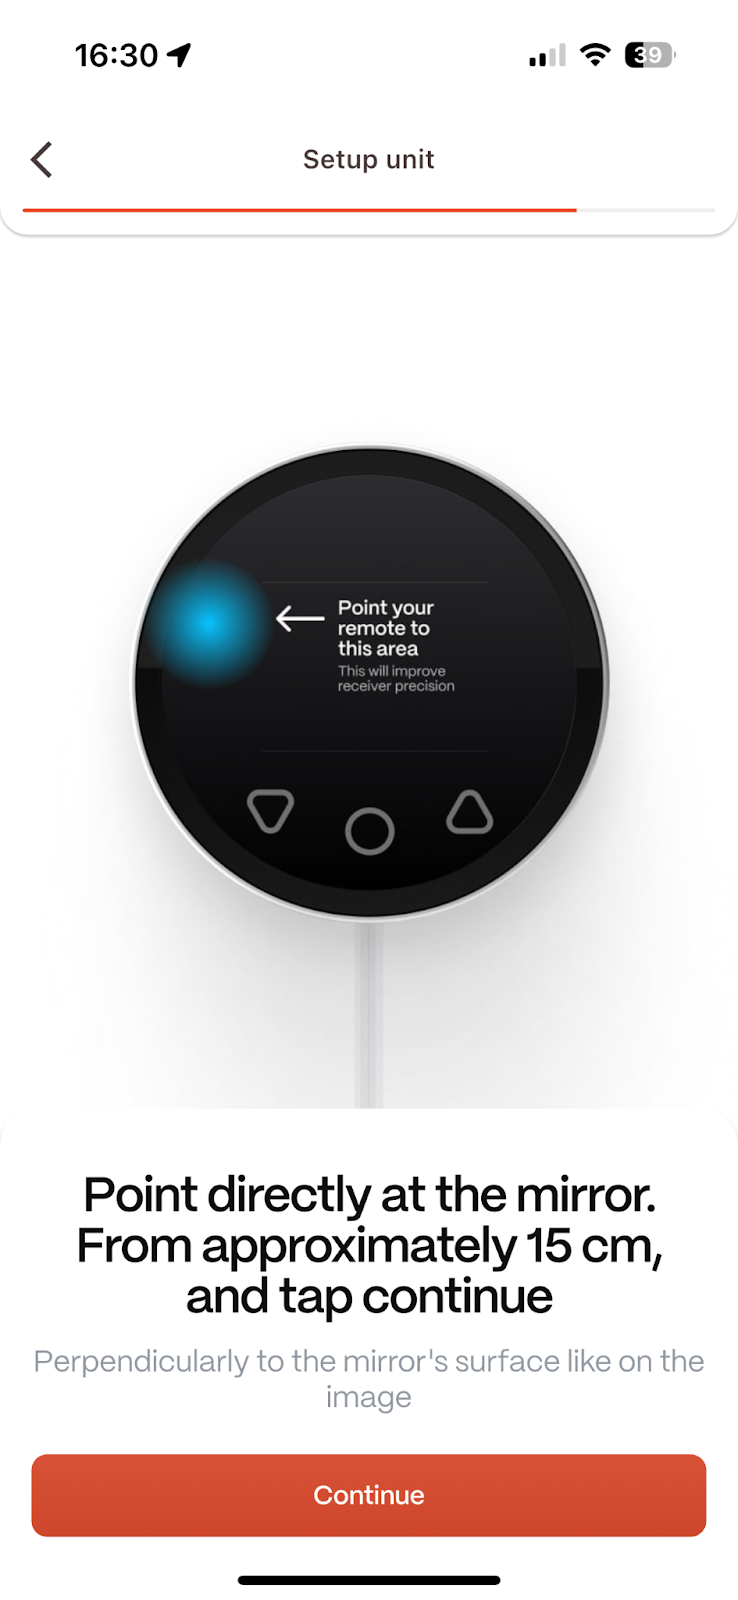
2. Detect the Controller
Hold your phone steady near the Boldr Controller.
Positioning is key: Place the back of your phone about 8 inches (20 cm) from the controller for best results.
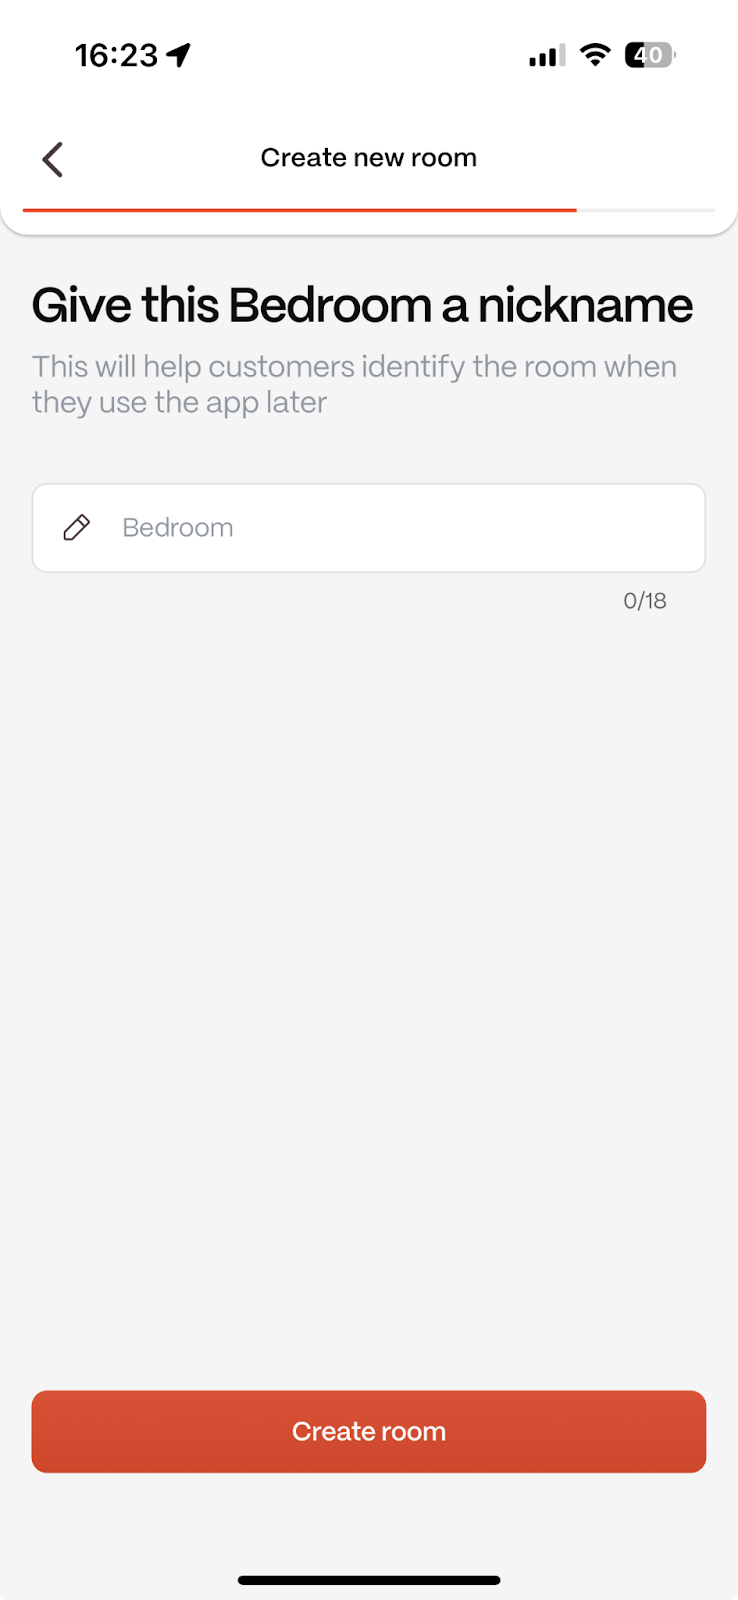
3. Create a Room
Select the room type where the controller is being installed (e.g., Bedroom, Living Room).
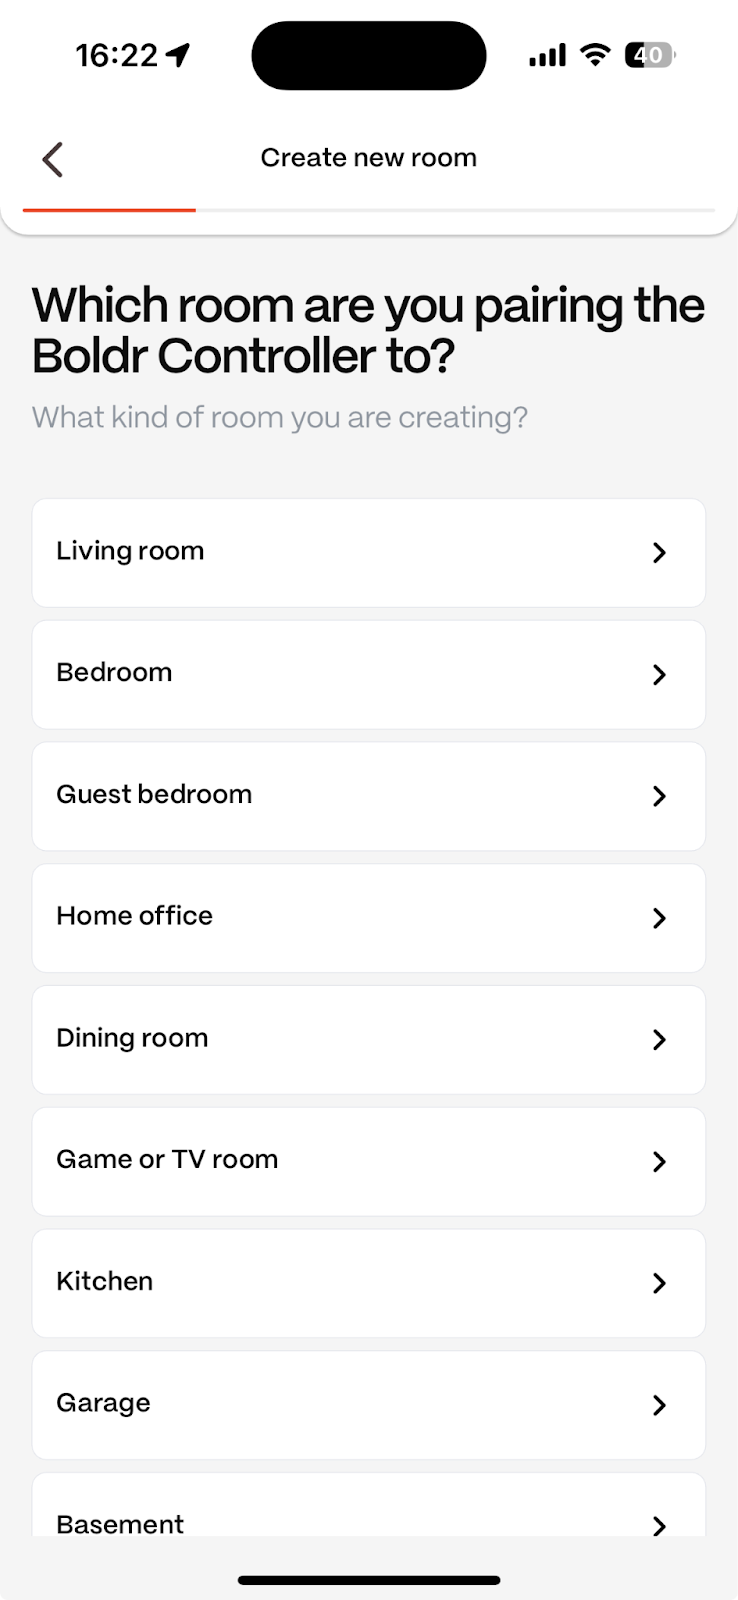
Give the room a nickname (e.g., "Master Bedroom") and tap Create Room.
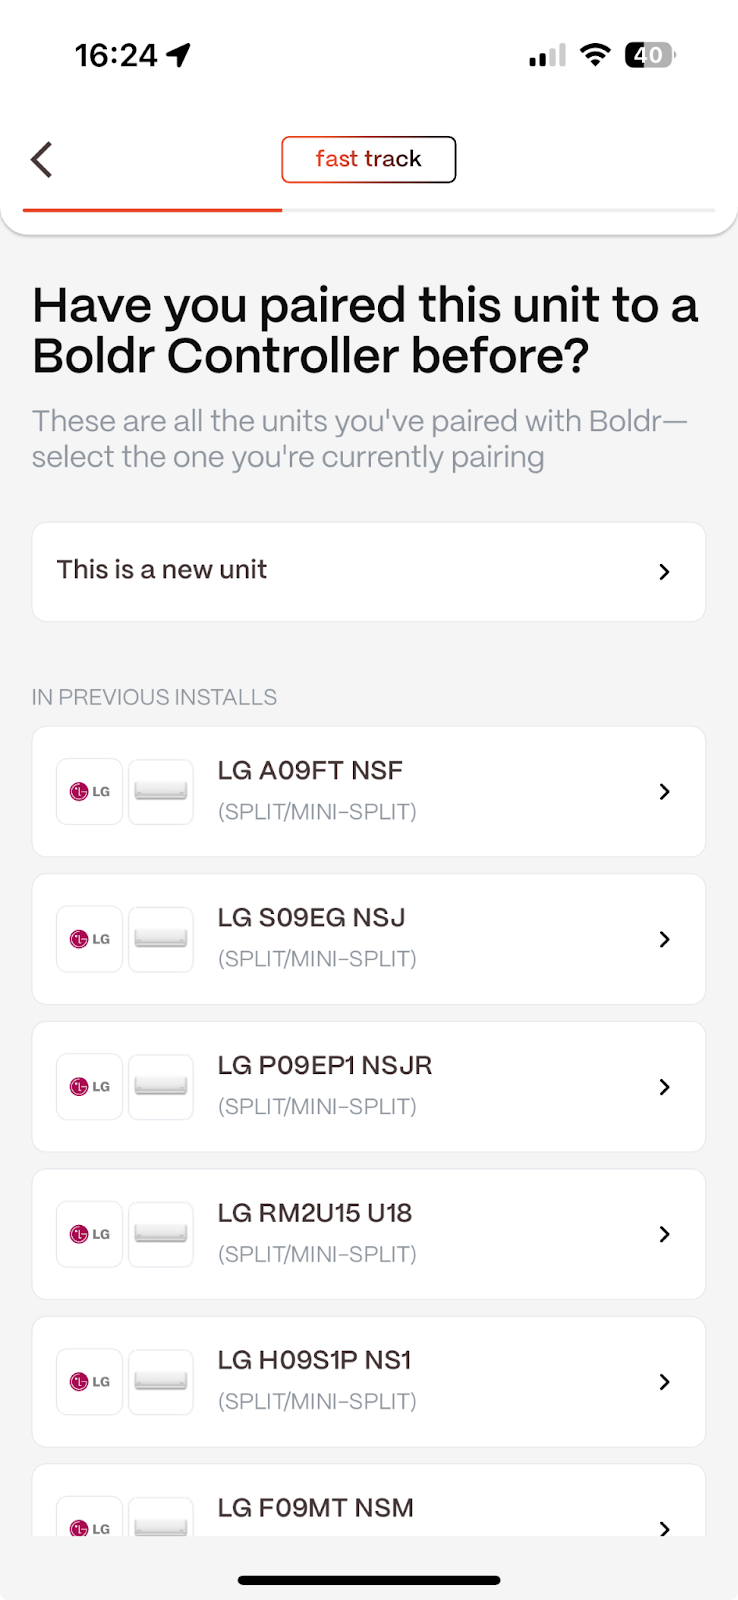
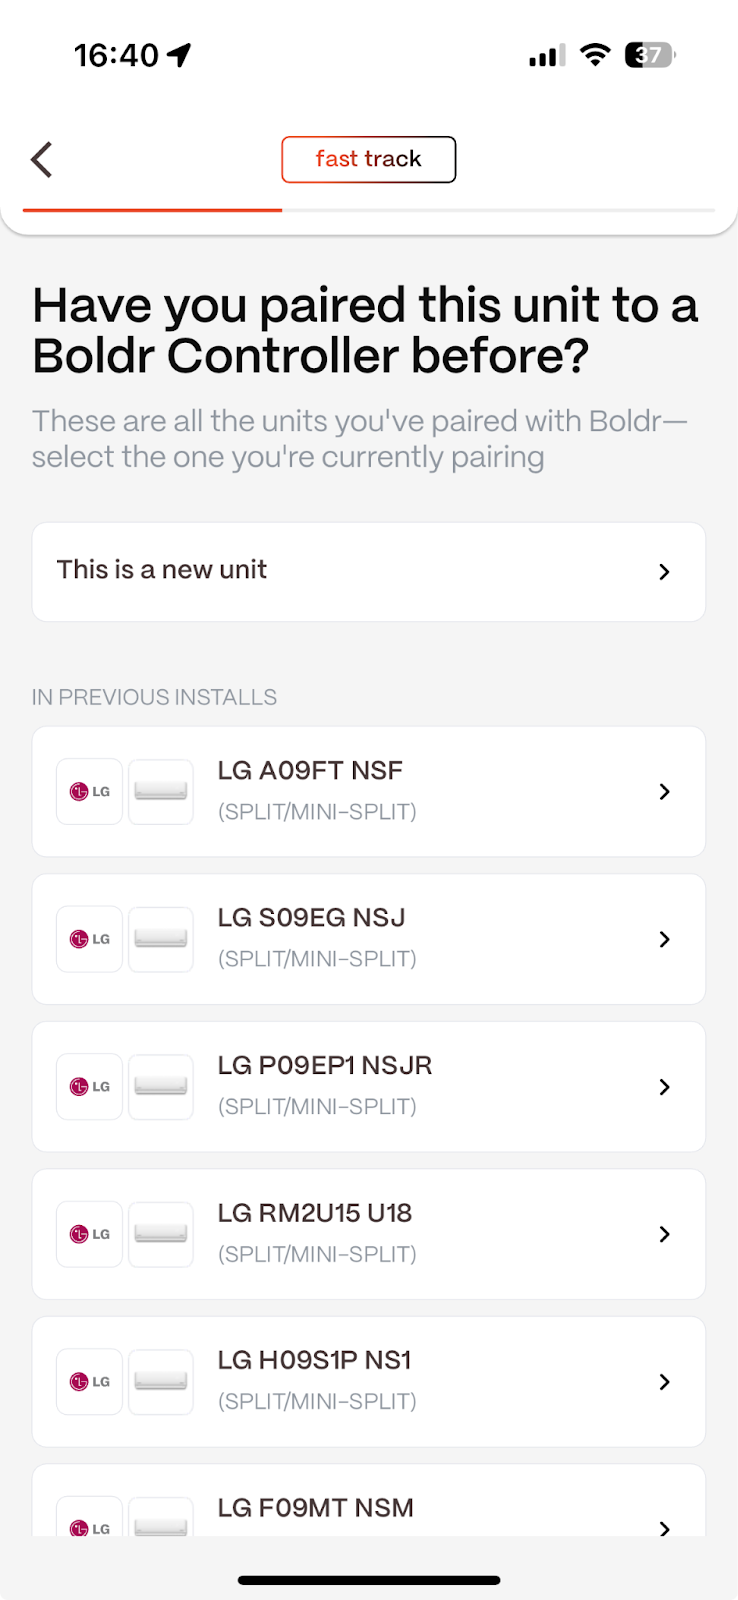
4. Choose the A/C Unit
Now, you need to tell the app which A/C unit the controller will manage.
If this is a brand-new A/C unit: Select This is a new unit and proceed to Step 5.
If you have paired this exact A/C unit before: Select it from the list of previously configured units to skip the remote control testing.
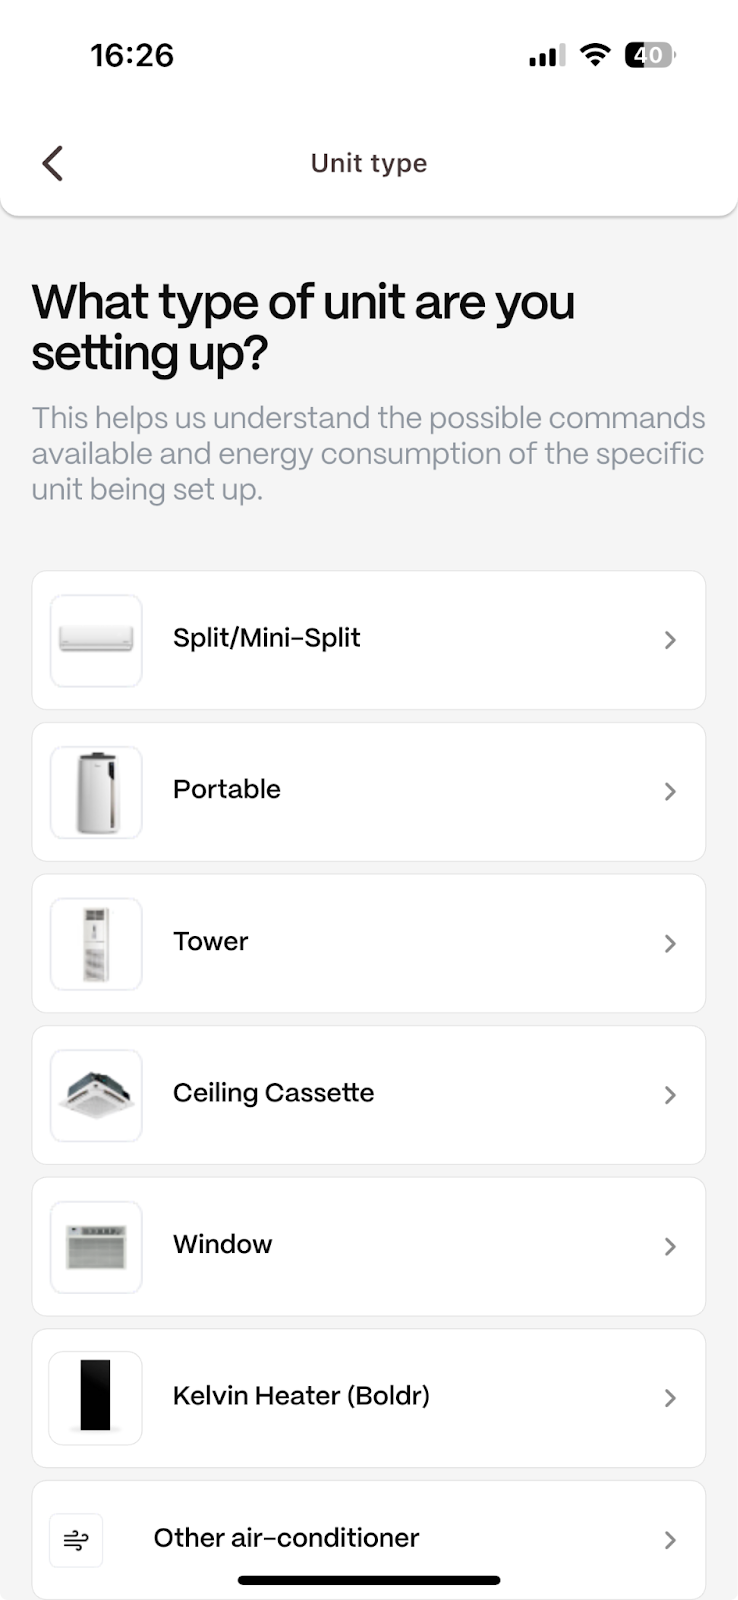
5. Configure a New A/C Unit
Select Unit Type: Choose the type of A/C (e.g., Split/Mini-Split).
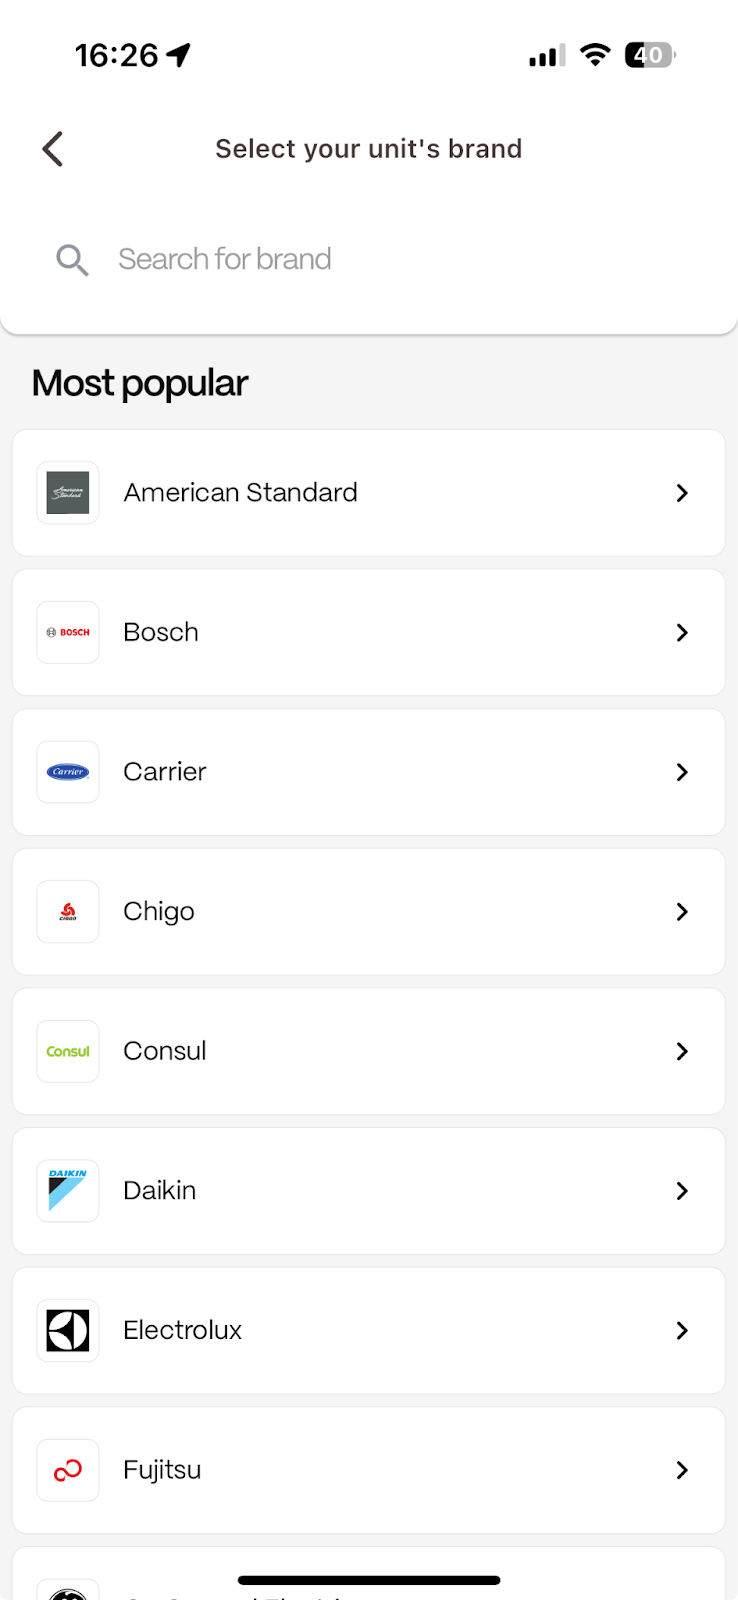
Select Brand: Find and tap the A/C unit's brand from the list.
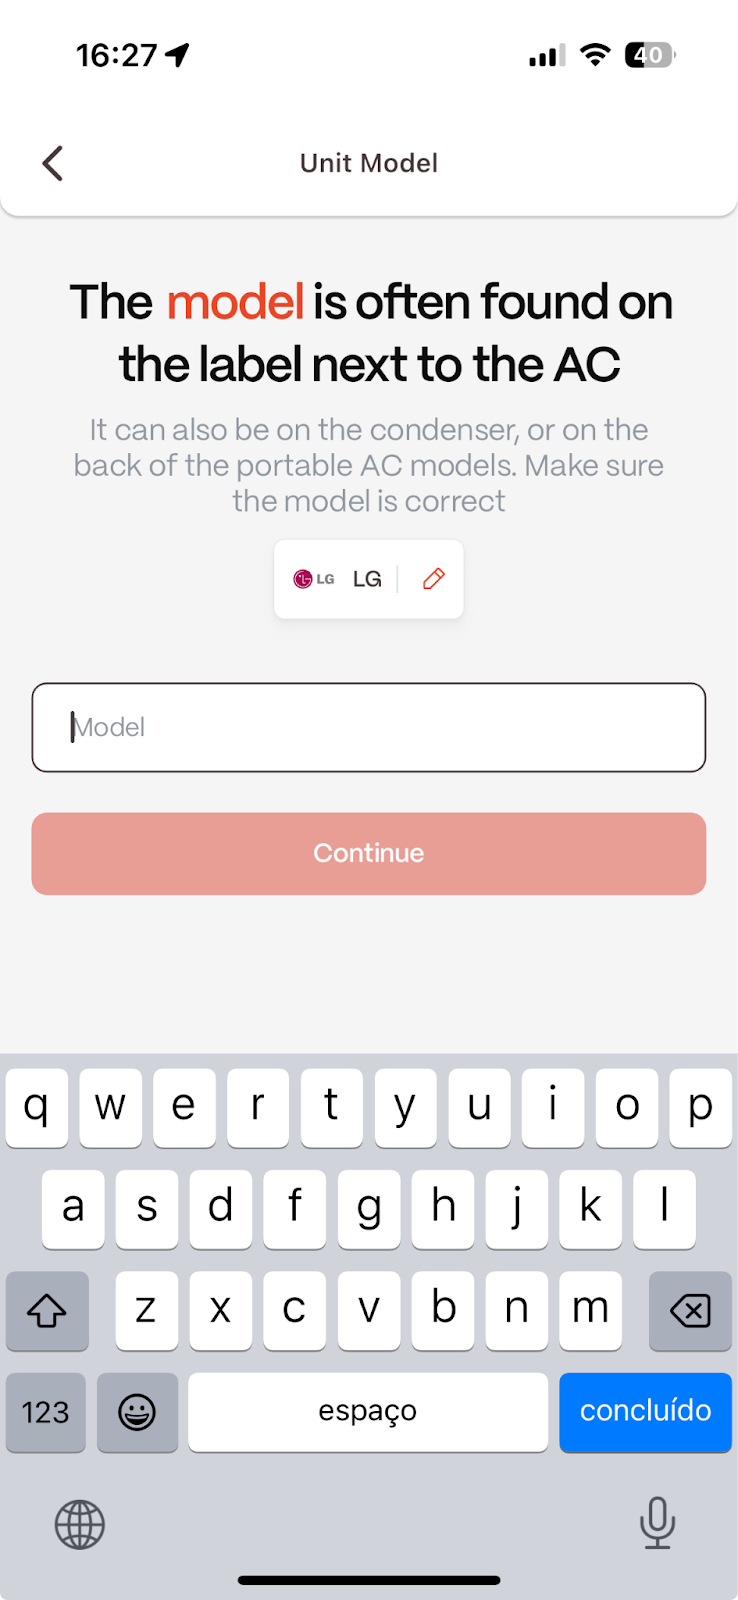
Enter Model: Type in the model number of the unit and tap Continue.
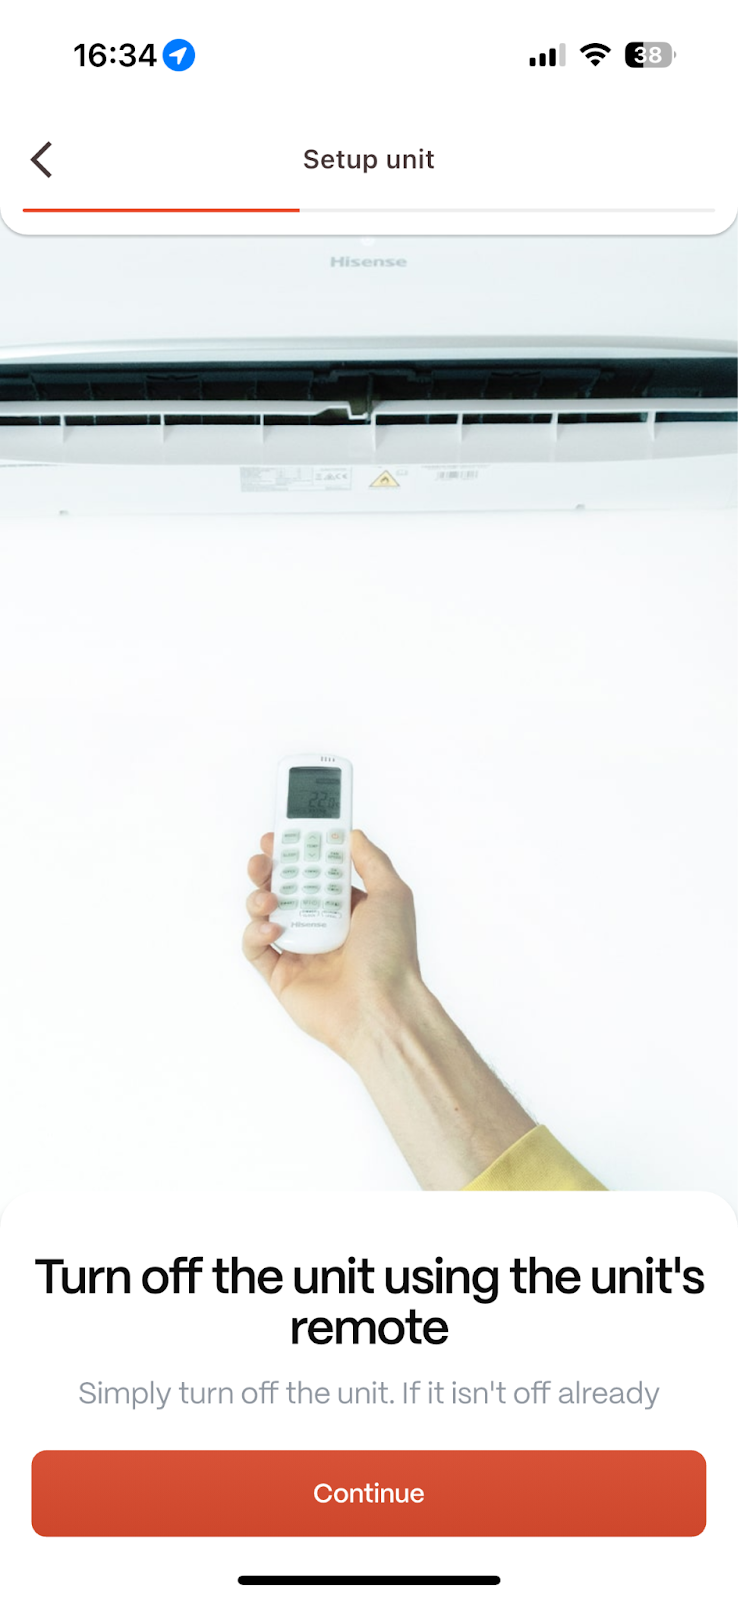
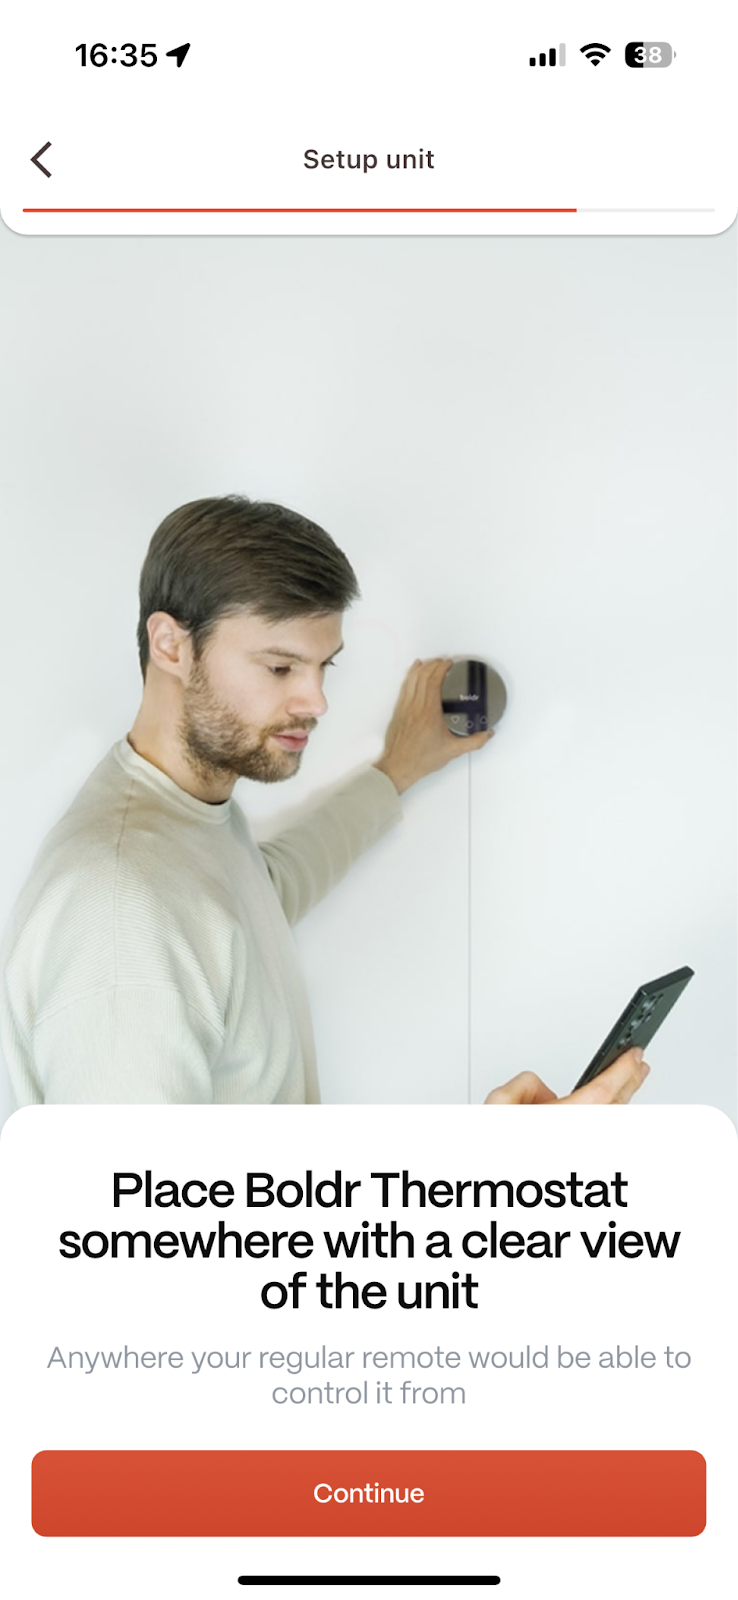
6. Pair the Remote Control
This is the most important step for ensuring the controller can communicate with the A/C.
Follow the on-screen instructions carefully.
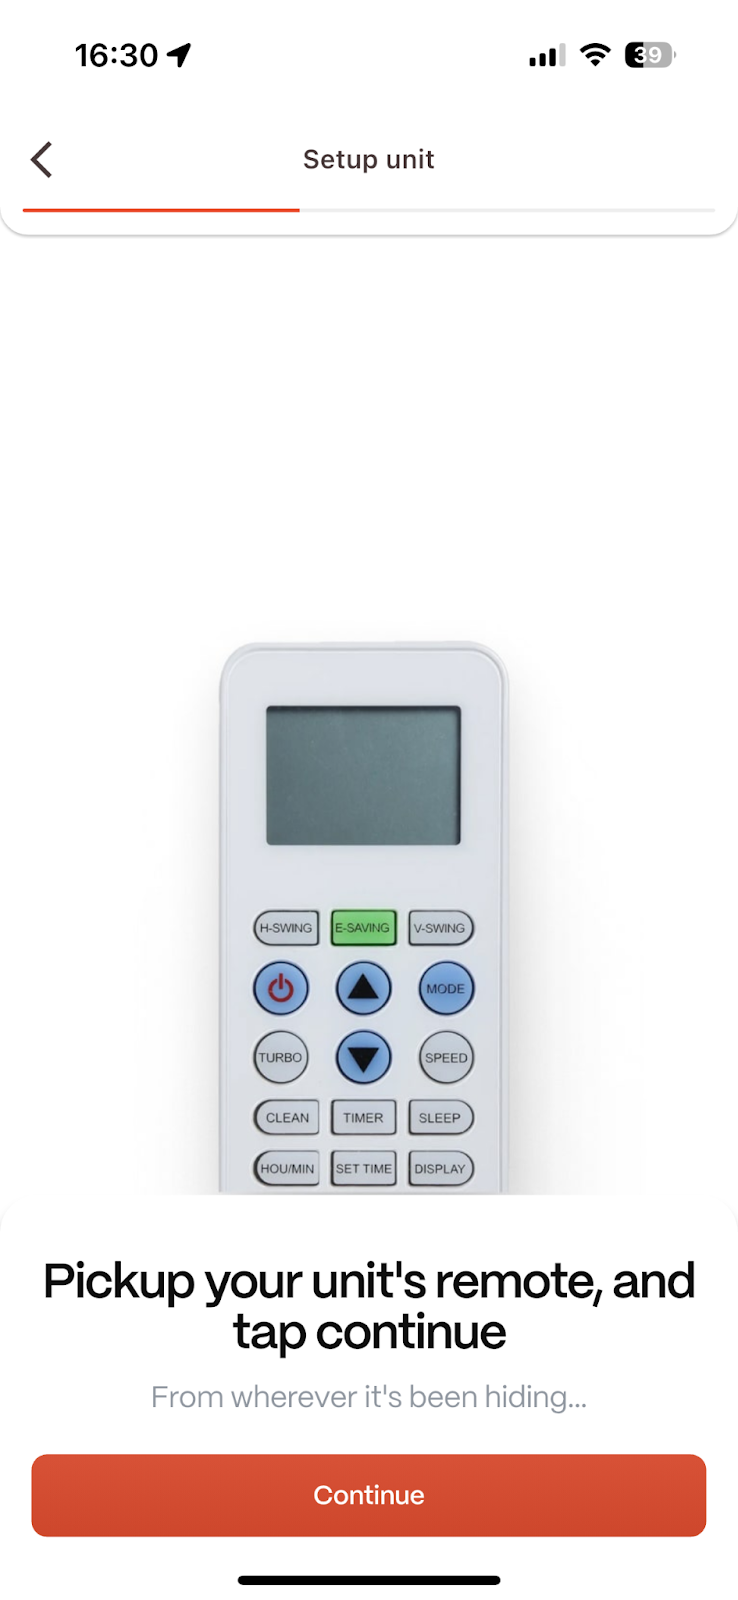

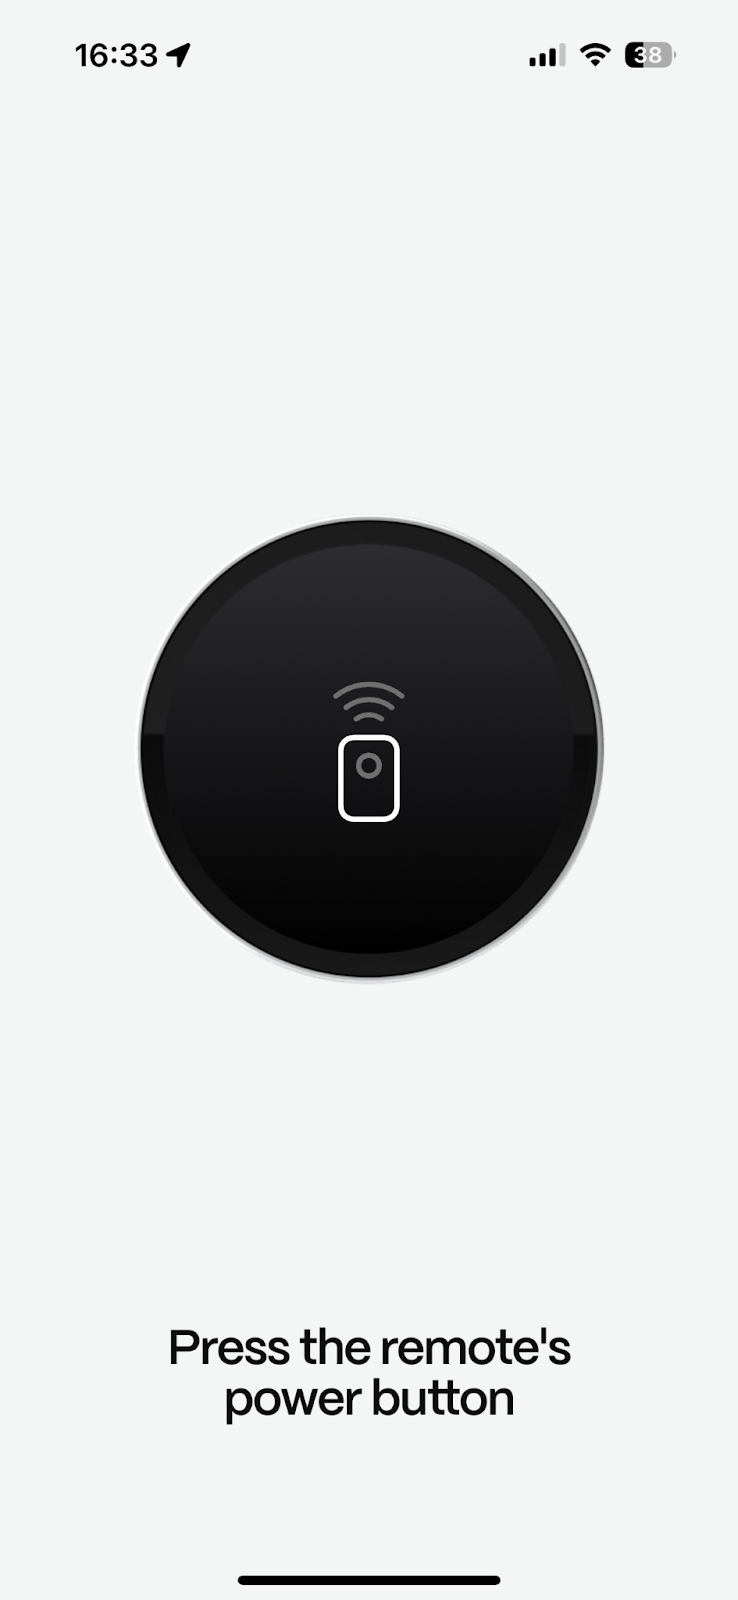
When prompted, point your A/C unit's original remote control directly at the Boldr Controller and press the Power button firmly on the remote. This allows the controller to capture the remote's unique IR (infrared) signal.
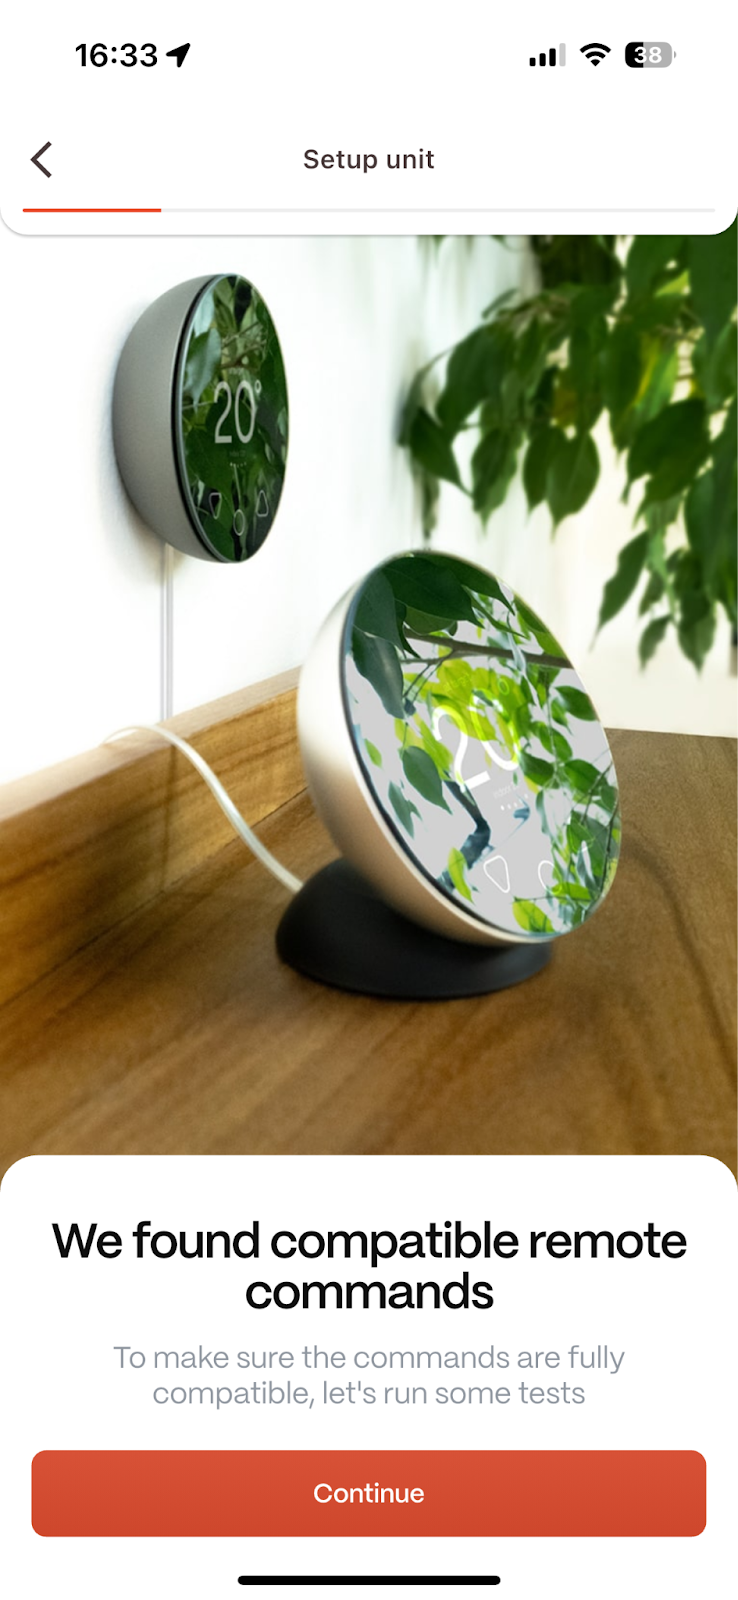
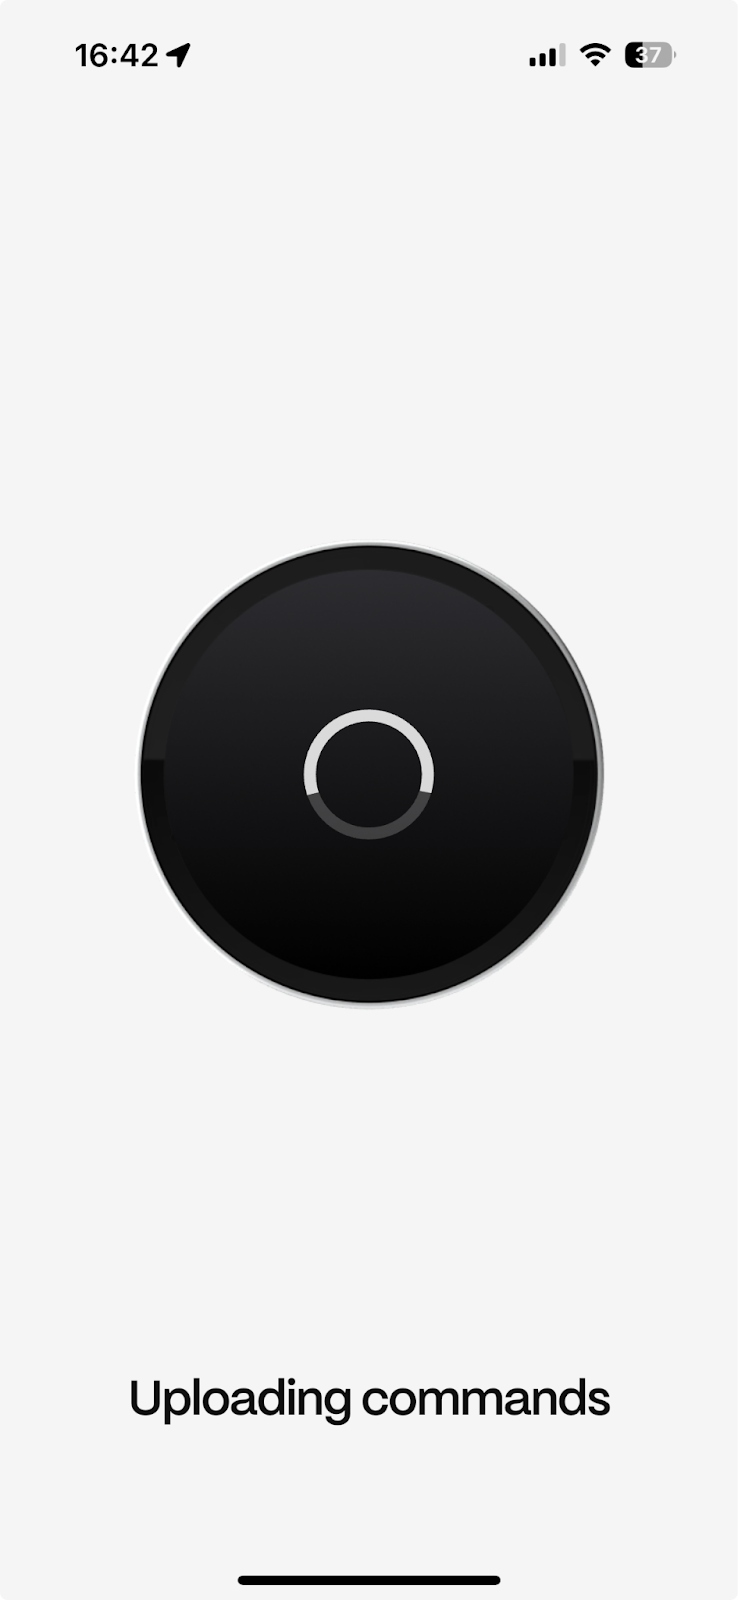
7. Test the Command Set
Based on the captured signal, the app will suggest compatible command sets.
Follow the guided tests (e.g., "Did your unit turn ON?") to confirm the commands work correctly.
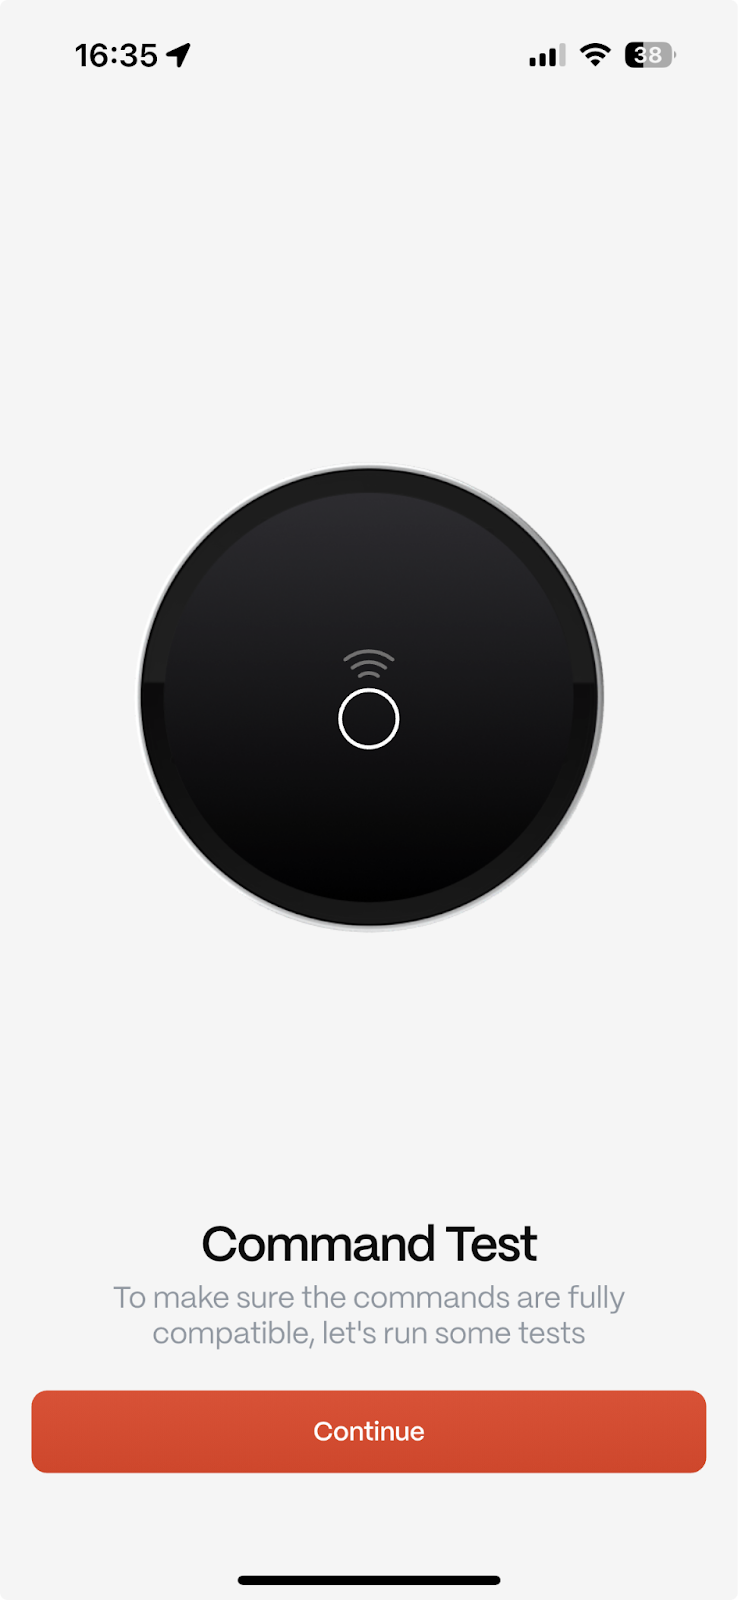
Once testing is complete, the setup is finished! You will be taken back to the property page.
Part 4: Managing Multiple Controllers
Adding More Controllers
To add another Boldr Controller to the same property, simply repeat the process from Part 3, Step 1.
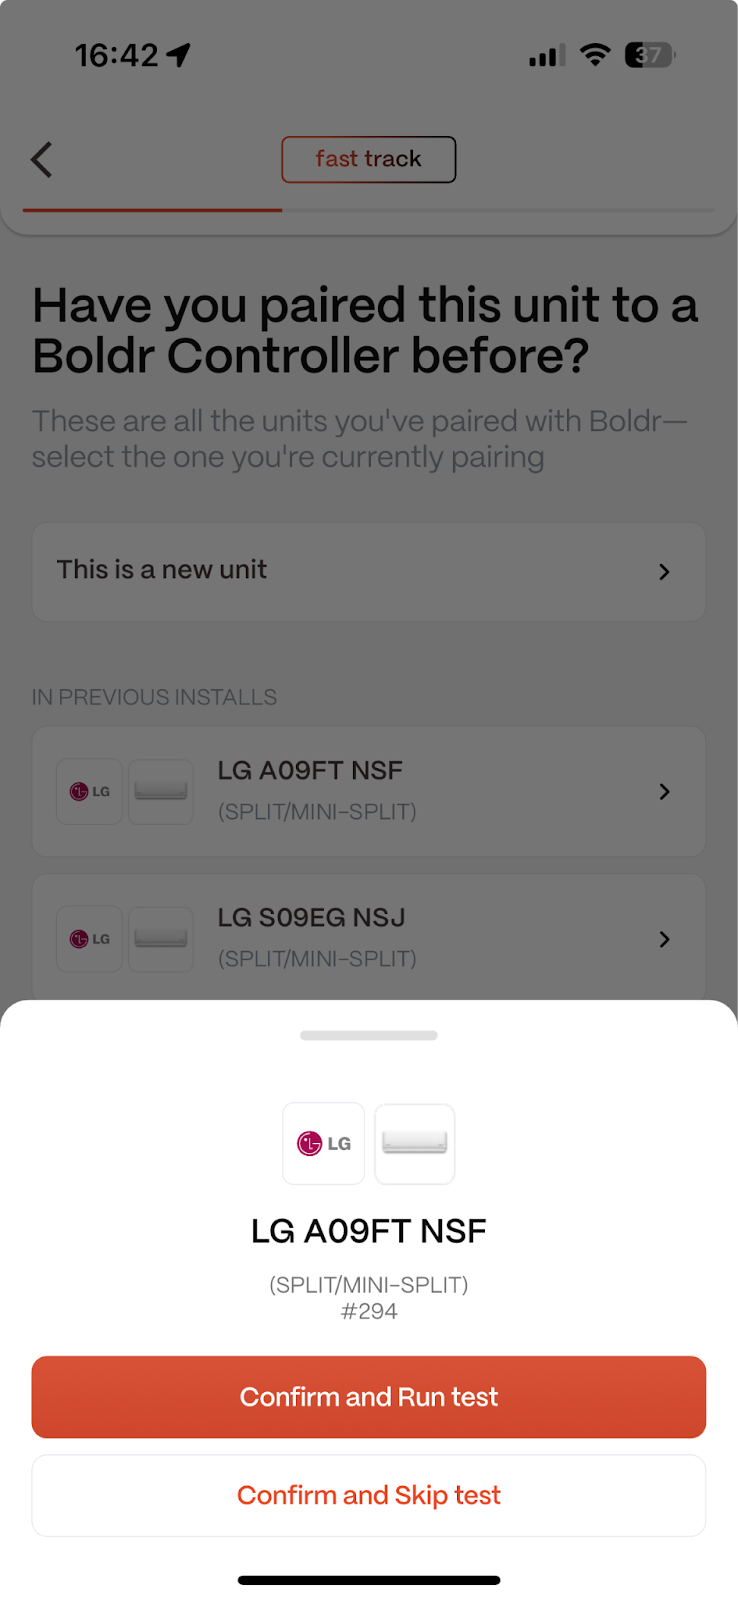
Using the Fast Track Option
If you are installing another controller on an identical A/C unit model, you can speed up the process.
After pairing the new controller, select the A/C unit you already configured.
The app will offer a Fast Track option.
You can choose to re-run the tests (recommended) or skip the tests.
Skipping will instantly apply the previously confirmed command set to the new controller. Only use this if you are certain the A/C units are identical.
Troubleshooting: Factory Reset
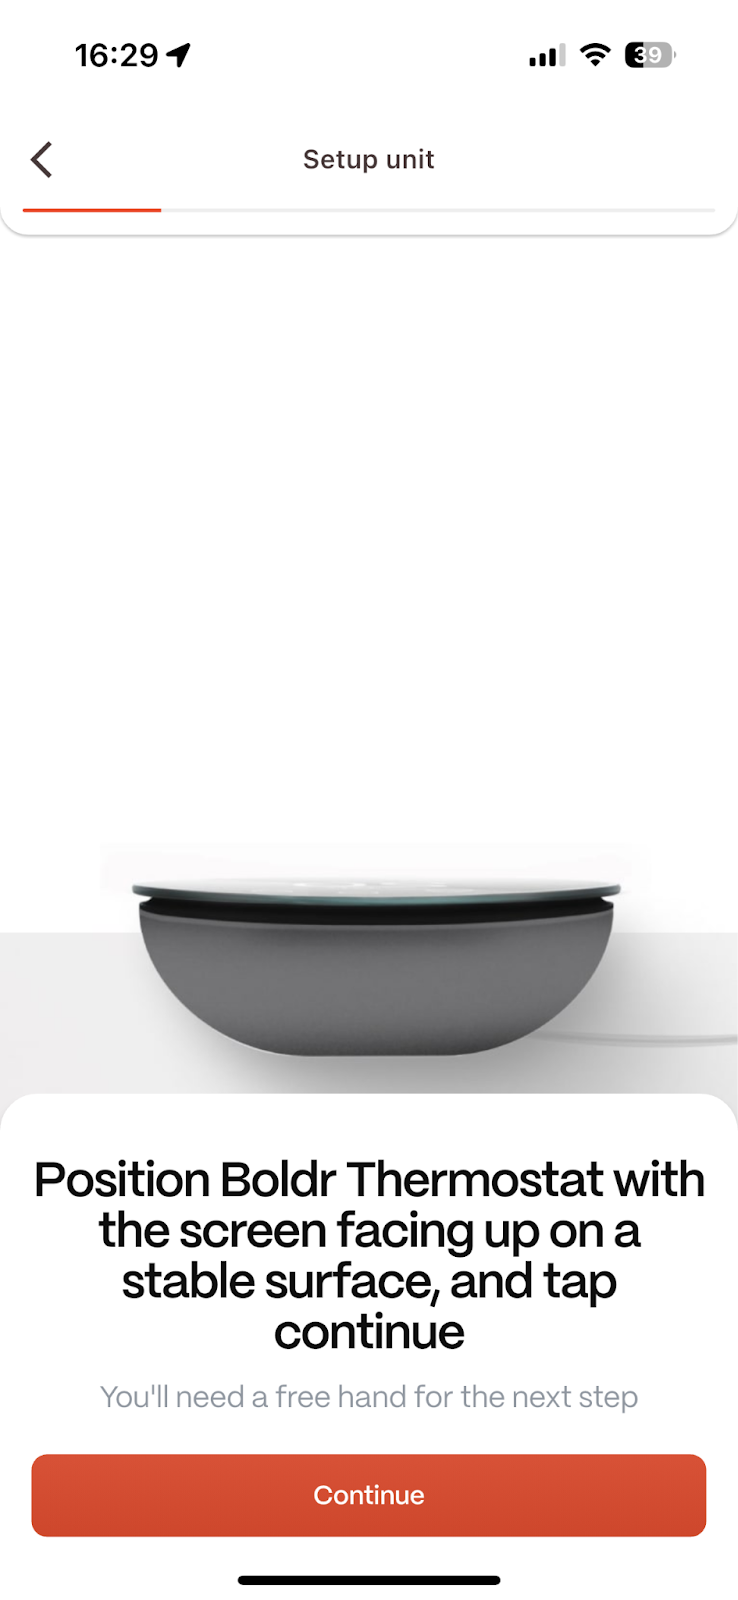
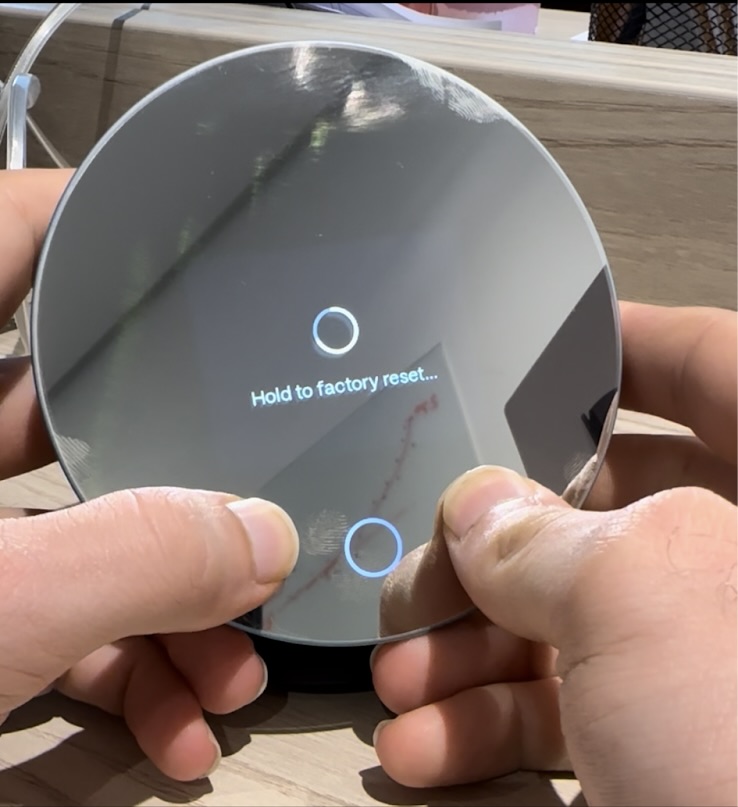
If you need to re-pair a controller from scratch (for example, for a demonstration), you can perform a factory reset on the device.
Press and hold both the Up (▲) and Down (▼) buttons on the Boldr Controller for 5 seconds.
Press the Center button (●) to confirm the reset. The device is now ready to be paired again.
Note: During normal operation, the Up (▲) and Down (▼) button lights on the Boldr Controller might not be continuously lit. This is normal behavior - Tap the middle button to wake up the arrows. You will still be able to factory reset it.

Part 5: Demonstrating the Boldr Customer App
This section explains how to demonstrate the powerful features of the Boldr Energy App. It's crucial to understand the two-step process for a real customer versus the streamlined process for your sales demo.
The Seamless Handover: From Installer to Customer
Installer's Role (Boldr Pro App): The process begins with the installer, who uses the Boldr Pro App to handle the technical setup. As detailed in Parts 1-4, their job is to physically install the Boldr Controllers, configure the A/C unit details, capture the remote's signal, and create the property.
Customer's Role (Boldr Energy App): After the installer leaves, the customer will have limited control of the unit through the Boldr Controller. To gain full control they can download the Boldr Energy App, where they will be guided to complete the final setup steps. The app guides the customer to stand near just one of their Boldr thermostats. From there, the app automatically discovers all other devices within the property that device was set up in, prompts the user a single time for their Wi-Fi credentials, and then seamlessly connects every controller to the network, one by one. This single, automated action brings the entire system online, giving the customer access to the full range of features like remote control, automations, and usage history.
Need Help?
Contact our Live Pro Tech Support Team at +1 (888) 269-1303, Monday to Friday, 9 AM to 6 PM ET.